Contentstudio Tutorial 2026: Setup to First Post
Starting with a new social media platform can feel intimidating, especially when you need to publish consistently across several channels. This contentstudio tutorial walks you through the practical first steps: creating an account, setting up a workspace, connecting profiles, creating content, and scheduling your first post.
This page may contain affiliate links. Our recommendation is based on verified product information and hands-on-style onboarding guidance designed to help you assess whether ContentStudio fits your workflow. If you decide it is a fit, you can start through ContentStudio via Top Trust Review and test the workflow before committing to a paid plan.
Official website · Latest pricing & offers
What ContentStudio Is and Who This Tutorial Is For: ContentStudio Tutorial Overview
ContentStudio is a unified social media management tool. Its official product areas include Publish, AI Studio, Analyze, Engage, Social Listening, and Discover, giving creators and teams a central place to manage core social media activities.
This guide focuses on the fastest path from signup to a live post. Rather than trying every feature immediately, you will begin with one workspace, one or two social profiles, and a simple piece of content.
Why beginners search for a ContentStudio tutorial
Most new users want to know how to use ContentStudio without spending hours learning every menu. The immediate goal is usually straightforward: connect an account, write a post, choose a time, and confirm it is scheduled or published correctly.
A practical contentstudio tutorial for beginners should also explain where each major module fits into a real workflow. Once you understand the basic publishing path, features such as analytics, social listening, and automation become far easier to evaluate.
Who should follow this guide: solo creators, small teams, and agencies
Solo creators can use ContentStudio to organize posts and keep a more regular publishing rhythm. Small businesses can centralize brand content, media, and planning instead of relying on disconnected spreadsheets or last-minute posting.
Marketing teams and agencies may also benefit from product areas such as workspaces, approval workflow, client management, white-label options, bulk scheduling, and white-label reseller capabilities. The right starting point, however, is still the same: establish one clean workflow before expanding.
What you’ll accomplish by the end: setup, workspace, and first post
By the end of this guide, you should be ready to:
- Create a ContentStudio account.
- Complete a basic ContentStudio workspace setup.
- Connect at least one social media profile.
- Draft a post with copy and media.
- Select a publishing time.
- Review results after the post goes live.
That is enough to make an informed decision about whether the platform feels natural for your content process.
ContentStudio Pricing, Free Trial, and What to Choose First: ContentStudio Tutorial Buying Guide
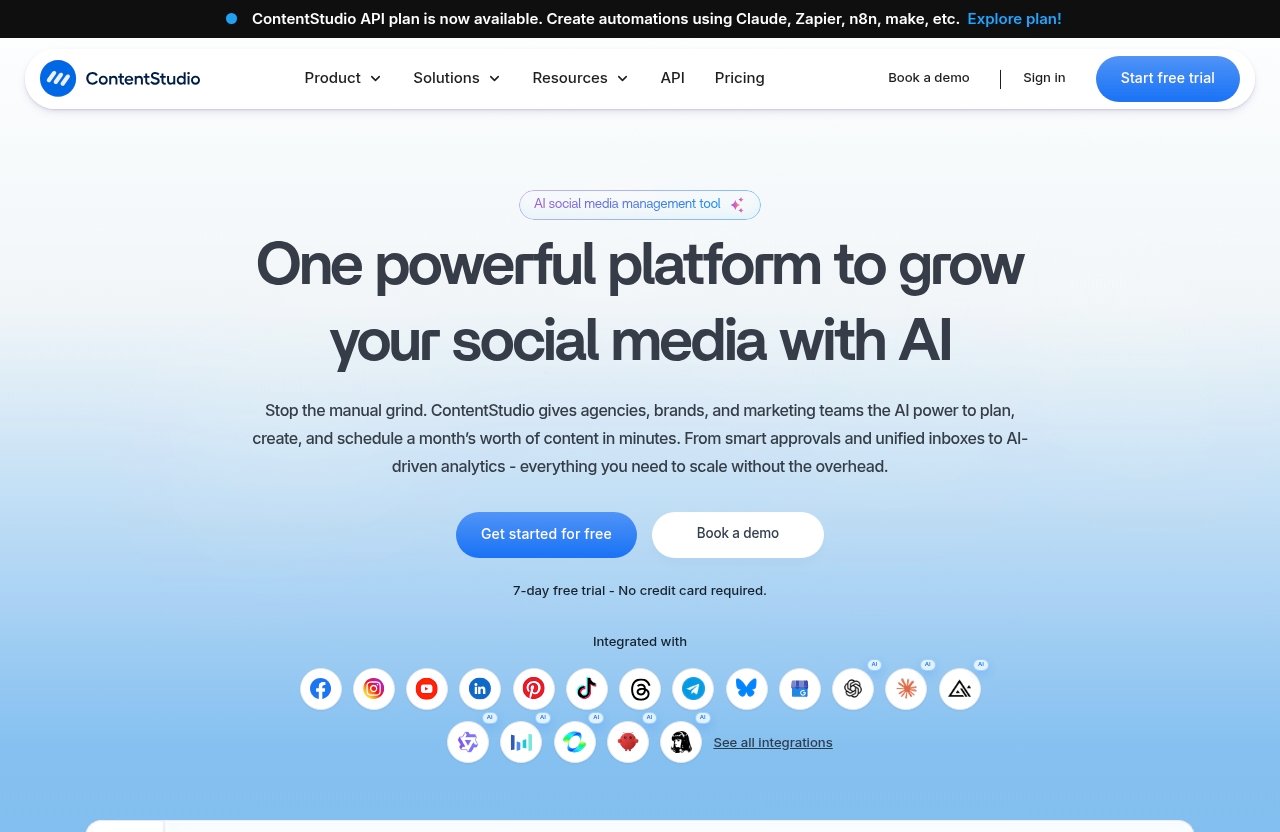
Before setting up anything, it helps to understand the verified entry points. ContentStudio’s official pricing page states that plans start from $19 per month. Its official homepage also states that a 7-day free trial is available and that no credit card is required.
Verified pricing plans from the official pricing page
The key verified ContentStudio pricing detail is simple: plans are available from $19 per month. Since pricing structures and included capabilities can change, review the current official pricing page before choosing a subscription.
Avoid choosing based on a feature list copied from an old review. Instead, compare the plan details shown during your evaluation with the number of brands, collaborators, workflows, and publishing needs you actually have.
How to decide whether to start with a free trial or paid plan
For most first-time users, the ContentStudio free trial is the sensible starting point. You can use the seven days to test the practical essentials: workspace organization, social account connections, post creation, scheduling, and the dashboard experience.
Use the trial with a real upcoming post rather than a placeholder. A genuine post lets you evaluate the parts that matter most, including whether your team can review content and whether the planning process matches your routine.
Which plan type is most relevant for beginners
Beginners should prioritize a plan that supports their immediate publishing workflow rather than buying for advanced needs they may not use yet. A solo creator may only need one organized workspace and a steady calendar, while an agency may eventually need client management, approvals, or white-label capabilities.
Start small, learn the platform, and reassess after you have published several posts. This approach makes ContentStudio pricing easier to judge based on actual value rather than assumptions.
Before You Start: Accounts, Access, and Preparation
A little preparation makes the contentstudio setup much smoother. Gather your core brand assets and confirm that you can access the social profiles you intend to connect.
What you need ready before signup
Before beginning this contentstudio tutorial, prepare the following:
- An email address you check regularly.
- Login access to the social profiles you manage.
- A clear idea of the brand, business, or client you will set up first.
- One post idea you can publish during your trial.
- A basic publishing goal, such as promoting a service, sharing an update, or repurposing a helpful tip.
If you work on behalf of a client, confirm who has authority over the social accounts before starting. This prevents delays when you reach the connection stage.
Recommended social profiles to connect first
Start with the one or two channels you use most often. Connecting every account on day one can create unnecessary complexity and makes it harder to learn your preferred posting workflow.
ContentStudio’s official homepage lists Facebook, Instagram, X, Google Business Profile, LinkedIn, TikTok, Bluesky, Meta Threads, YouTube, Pinterest, and Telegram among the networks it supports. Choose the profiles where your audience is already active and where you have permission to publish.
Optional assets to prepare: logo, brand colors, post copy, and images
You do not need a full brand kit to publish your first update, but having a few assets ready saves time. Prepare a logo, approved images or video, a short caption, a destination link if relevant, and any preferred wording.
If you regularly create visual content, consider organizing assets before uploading them. ContentStudio includes a media library among its listed features, which can help support a more orderly workflow over time.
Step 1: Create Your ContentStudio Account
Your ContentStudio account setup should take only a few focused actions. Keep your first session simple: signup, email confirmation, initial workspace decisions, and a quick dashboard review.
Sign up from the homepage or pricing page
- Visit the official ContentStudio homepage or pricing page.
- Select the option to begin signup or start the available trial.
- Enter the requested account details accurately.
- Review the information before submitting it.
The official homepage states that the 7-day free trial does not require a credit card. That makes it practical to test the product with a real publishing task before making a subscription decision.
Confirm your email and enter the dashboard
After registering, check your inbox for any account confirmation instructions. Complete the confirmation process if prompted, then sign in to access the ContentStudio dashboard.
Do not worry if the dashboard initially feels broad. A unified social media management tool naturally contains more than one area, but your immediate focus should remain on the workspace and publishing flow.
Choose the workspace structure that matches your team
During this stage of the contentstudio tutorial, think in terms of brands and responsibilities. A solo creator can generally begin with one workspace for one brand, while a consultant or agency should separate brands or clients in a way that keeps content and approvals organized.
Choose names your future self and teammates will recognize immediately. Clear naming is especially helpful once you begin using multiple workspaces or client management processes.
Step 2: Set Up Your Workspace for Fast Publishing
A workspace is the foundation of an organized publishing system. Treat it as the home for one brand, client, or clearly defined content operation.
Naming your workspace
Use a direct, recognizable workspace name. For example, use your company name, client brand name, or a descriptive label for a specific campaign operation.
Avoid vague names such as “Main” or “New Workspace.” A precise label reduces confusion once your ContentStudio workspace setup grows beyond a single account.
Adding team members or collaborators
If you work alone, skip collaborator setup until you have completed your first publishing workflow. If you work with a small team, invite only the people who need to create, review, or manage content.
ContentStudio lists approval workflow and client management among its top features. Those capabilities can be useful when multiple people contribute to posts, but keep your first process uncomplicated and agree internally on who writes, reviews, and approves content.
Choosing the right workspace setup for solo users vs agencies
Solo users should build one repeatable workflow: draft, review, schedule, then check performance. Agencies should consider a more structured setup that separates each client and gives stakeholders a clear review process.
The most effective contentstudio setup is not the most complex one. It is the one that helps you find assets, avoid posting to the wrong profile, and maintain consistent publishing.
Step 3: Connect Your Social Media Accounts
Once your workspace is ready, connect a single social profile and confirm it is the correct destination. This is the point where preparation pays off because you will need the relevant account access.
How to connect supported networks
- Go to the area of the platform used to add or manage social connections.
- Select the network you want to connect.
- Follow the authorization instructions shown by the platform and the social network.
- Confirm that you are connecting the correct profile, page, channel, or business presence.
- Return to your workspace and verify that the account appears as an available publishing destination.
The official homepage lists Facebook, Instagram, X, Google Business Profile, LinkedIn, TikTok, Bluesky, Meta Threads, YouTube, Pinterest, and Telegram. Available options can depend on the account type and the network’s own authorization requirements.
Best order to connect accounts for a first launch
For a first launch, connect your primary channel first. If LinkedIn drives most of your business conversations, begin there; if your local business relies on Google visibility, start with your Google Business Profile.
After your first post is successful, add the next most important profile. This staged approach is less risky than trying to manage many destinations while you are still learning how to use ContentStudio.
Troubleshooting connection issues at a high level
If you cannot connect a profile, first verify that you are logged into the correct social account in your browser. Also check whether you have the necessary authorization for the page, profile, or channel you selected.
If the connection does not appear after authorization, try signing out and back in, then repeat the process carefully. For network-specific requirements or persistent errors, use ContentStudio’s official help documentation or video tutorials rather than relying on outdated third-party instructions.
Official website · Latest pricing & offers
Step 4: Navigate the Dashboard and Core Modules: ContentStudio Tutorial Map
The ContentStudio dashboard brings multiple social media activities together. You do not need to master all modules now, but knowing their purpose will help you choose the right place for each task.
Publish
Publish is the core area for creating, scheduling, and managing social content. This is where your contentstudio first post workflow begins and where you will return most frequently as a new user.
ContentStudio also lists a Calendar/Planner, smart scheduling, bulk scheduling, a media library, and approval workflow among its top features. These tools support planning beyond one-off posting.
AI Studio
ContentStudio AI Studio is a product area for AI-assisted work. If you need help developing an initial caption or content concept, explore it as an optional aid rather than a replacement for your brand voice.
ContentStudio also lists an AI content library and AI video generator among its features. Review anything generated by AI before publishing to ensure the language, claims, and style remain accurate for your business.
Analyze
Analyze is the place to review performance data after you publish. Use it to identify which content themes, formats, and posting approaches deserve more attention.
ContentStudio lists competitor analytics, Google Ads Analytics, and Meta Ads Analytics among its top features. These are worth exploring once you have a baseline publishing rhythm and a specific question to answer.
Engage
Engage relates to managing social interactions in a unified workflow. As your accounts become more active, this can help you keep communication from becoming fragmented across separate platforms.
New users should focus first on publishing accurately. Add an engagement routine later, such as checking messages and interactions at a consistent time each day or week.
Social Listening
Social Listening helps you monitor relevant conversations and topics. It can be useful for discovering audience questions, brand mentions, content ideas, and broader industry discussion.
Start with a narrow goal, such as monitoring your business name or a single topic. An unfocused listening process can generate more information than a beginner can meaningfully use.
Discover
Discover is another official ContentStudio product area. Use it as part of a content research routine when you need new angles, relevant topics, or ideas for a future post.
The best research does not copy competitors or trending posts. Instead, use what you find to create more useful content in your own voice.
Step 5: Create Your First Post in ContentStudio
Now it is time to create your first real update. Keep this contentstudio tutorial exercise simple: one clear message, one destination profile, and one piece of approved media.
Choose post type and destination profile
- Open the publishing area.
- Start a new post according to the options shown in your dashboard.
- Select the connected social profile where you want the post to appear.
- Double-check the destination before writing or scheduling anything.
For your first post, avoid sending the same message everywhere. Different networks have different audience expectations, so testing one channel first gives you a clean baseline.
Write copy and add media
Write a caption with one main point. A reliable formula is: helpful opening, one useful detail, and a simple next step for the reader.
Next, add an image, video, or other approved creative asset where appropriate. Review that the media belongs to the correct brand, represents the offer accurately, and matches the context of the selected social network.
A good first post could be a product update, a practical tip, a customer-focused answer, or a brief introduction to your service. The goal is to learn the process, not create your most elaborate campaign.
Use AI-generated captions or assets if helpful
If you need a starting point, ContentStudio AI Studio may help you generate ideas or refine a draft. Provide clear context about your audience, service, tone, and desired outcome so the result is more relevant.
Never publish an AI-generated caption without checking it. Edit for brand voice, factual accuracy, readability, and any industry-specific compliance requirements that apply to your organization.
Preview before publishing
Before moving to scheduling, read the post aloud once. Look for broken links, unclear wording, unfinished placeholders, misspellings, and incorrect profile selection.
This final pause is one of the best habits in a contentstudio first post process. It prevents small errors that can be easy to miss while you are learning a new dashboard.
Step 6: Schedule Your First Post
Scheduling lets you prepare content ahead of time while keeping control over when it goes live. ContentStudio lists publishing, Calendar/Planner, smart scheduling, and bulk scheduling among its official features.
Pick the publish time
Choose a time when your audience is likely to be active, based on your own experience and existing channel data. If you do not have enough data yet, choose a reasonable business-hour or audience-relevant time and treat it as a test.
Be mindful of time zones, especially if you serve clients or audiences in different locations. Record your chosen time so you can compare it with future results.
Use calendar/planner and smart scheduling concepts
The ContentStudio planner and calendar approach can help you see content in context rather than as isolated posts. Look ahead for gaps, major announcements, promotions, holidays, and duplicate topics.
Smart scheduling is listed as a ContentStudio feature. When evaluating it, compare its suggested or available scheduling workflow with your own content goals and review requirements.
Save, queue, or schedule the post
Follow the publishing options shown in your account to save the draft, place it in your workflow, or schedule it for your selected time. Before finalizing, confirm the post copy, media, profile, and timing once more.
A successful contentstudio scheduling tutorial habit is to inspect your calendar after scheduling. Make sure the post appears on the intended date and does not conflict with another campaign or client update.
Step 7: Review, Measure, and Improve
Publishing is not the finish line. The most useful social media workflow includes a short review cycle so you can apply what you learn to the next post.
Check basic analytics after publishing
After the post has had time to generate activity, visit Analyze and review the available performance information. Look for patterns rather than judging a post solely on one metric.
Ask practical questions: Did the message reach the intended audience? Did the image support the topic? Did the posting time seem reasonable? Did people engage with the content in the way you expected?
Use insights to refine future posts
Use your findings to improve one variable at a time. You might test a clearer opening line, a different creative format, a more focused topic, or a different publishing time.
This is where a contentstudio tutorial becomes an ongoing system rather than a one-time setup task. Consistent review helps you build content decisions around evidence instead of guesswork.
When to explore competitor analytics or automation
Explore competitor analytics when you have a defined research purpose, such as understanding common content themes in your market. Use the insight to identify gaps or improve relevance, not to imitate another brand’s voice.
ContentStudio automation is best explored after your standard workflow is reliable. The official homepage also mentions an API plan with automations using Claude, Zapier, n8n, make, and similar tools, which may be relevant for advanced workflows.
Common Setup Problems and Quick Fixes
Most early issues are simple setup problems rather than serious platform failures. Work through the basics methodically before changing your entire workflow.
Account access issues
If you cannot access your account, first check the email address used during signup and search for confirmation messages. Reset your password if necessary and ensure that browser extensions or stored logins are not causing confusion.
For ongoing access difficulties, consult official ContentStudio support resources. Avoid sharing account credentials with teammates as a shortcut.
Social profile connection problems
When ContentStudio connect social accounts attempts fail, confirm that you are logged into the intended network account and have proper authorization. Also verify that you selected the correct page, channel, or business profile during the connection flow.
If an existing connection stops working, reconnecting may help, but follow the current official instructions. Social network permissions and connection requirements can change.
Content or scheduling mistakes
If you notice a mistake before publishing, edit the copy, media, destination, or time in the relevant post workflow. If the post is already live, review what correction is appropriate for that network and your brand standards.
Use drafts for any post requiring extra review. This is particularly important for regulated industries, client work, promotions, and posts containing links or time-sensitive information.
When to consult official docs
Consult official ContentStudio documentation or video tutorials when you encounter a network-specific connection issue, an unfamiliar dashboard option, or a workflow that affects clients and approvals. Official resources are the best source for current product behavior.
You can also explore related social media management guides and scheduling resources on Top Trust Review to compare onboarding approaches before expanding your stack.
Best Practices for New ContentStudio Users
The best way to gain confidence is to build a small, repeatable routine. Consistency is more valuable than trying every advanced feature in your first week.
Start with one brand and one workflow
Use one workspace, one primary channel, and one content theme at the start. This makes it easier to understand how the ContentStudio dashboard fits your daily work.
After you have completed a few publishing cycles, add another channel or a more advanced feature. Gradual expansion keeps your content process manageable.
Build a repeatable posting system
Create a weekly routine that includes idea generation, drafting, asset preparation, review, scheduling, and performance checks. Use the ContentStudio planner to see whether your content calendar is balanced and realistic.
Keep a small bank of approved topics and media assets. This reduces the pressure to create every post from scratch and gives you more time to improve message quality.
Use approvals if working with clients or teammates
If other people need to review posts, establish a clear approval process before scheduling. Decide who owns final edits, who approves sensitive posts, and how far in advance drafts should be ready.
ContentStudio lists approval workflow among its features, making it relevant for teams that need a more controlled publishing process. Clear communication is still essential, even when the tooling supports the workflow.
Official website · Latest pricing & offers
FAQ
How do I start using ContentStudio as a beginner?
Start by signing up, completing any email confirmation steps, and creating one workspace. Then connect one social profile, draft a simple post, add media, choose a publishing time, and review the result after it goes live.
Does ContentStudio offer a free trial?
Yes. The official ContentStudio homepage states that it offers a 7-day free trial with no credit card required.
How much does ContentStudio cost?
The official ContentStudio pricing page states that plans start from $19 per month. Check the official pricing page for current plan details before subscribing.
Which social networks can I connect in ContentStudio?
The official homepage lists Facebook, Instagram, X, Google Business Profile, LinkedIn, TikTok, Bluesky, Meta Threads, YouTube, Pinterest, and Telegram.
Can ContentStudio help with scheduling and automation?
Yes. ContentStudio lists publishing, smart scheduling, bulk scheduling, and automation among its features. Its homepage also mentions an API plan with integrations and automations using Claude, Zapier, n8n, make, and similar tools.
Final Verdict: Is ContentStudio Worth Using in 2026?
ContentStudio is worth considering if you want a unified social media management tool that brings publishing, planning, analytics, engagement, social listening, discovery, and AI-related tools into one broader workflow. This contentstudio tutorial is intentionally focused on the essential first steps, because that is the best way to determine whether the platform suits your real needs.
Best fit for solo creators
Solo creators who want a more organized publishing routine may find the workspace, publishing, media, planner, and smart scheduling concepts especially useful. Start with a single brand and use the trial to see whether the daily workflow saves time and improves consistency.
Best fit for agencies and teams
Agencies and growing teams may appreciate the potential for workspaces, approval workflow, client management, bulk scheduling, and white-label-related capabilities. The key is to test your actual review process with one client or campaign before rolling it out broadly.
Who may want to compare alternatives first
You may want to compare alternatives first if you need a very narrow, single-purpose tool or have highly specialized requirements that must be confirmed before purchase. Review current official documentation and pricing details, particularly if integrations, analytics, permissions, or multi-client workflows are critical.
For most beginners, the clearest next step is to use the verified 7-day trial, publish one real post, and decide based on the experience. You can try ContentStudio through Top Trust Review, then move to a paid plan only if the workflow proves useful for your content operation.
Related Reading
- ContentStudio Social Media Automation Review 2026
- Taplio for Agencies Review 2026
- Post Planner for Small Business Review 2026
References
- ContentStudio: Unified Social Media Management Tool
- ContentStudio Pricing | Plans From $19 per Month
- Video Tutorials – ContentStudio Support & Documentation
- Getting started with ContentStudio: A beginner's guide