How to Use Post Planner for Facebook: A Beginner’s Step-By-Step Guide
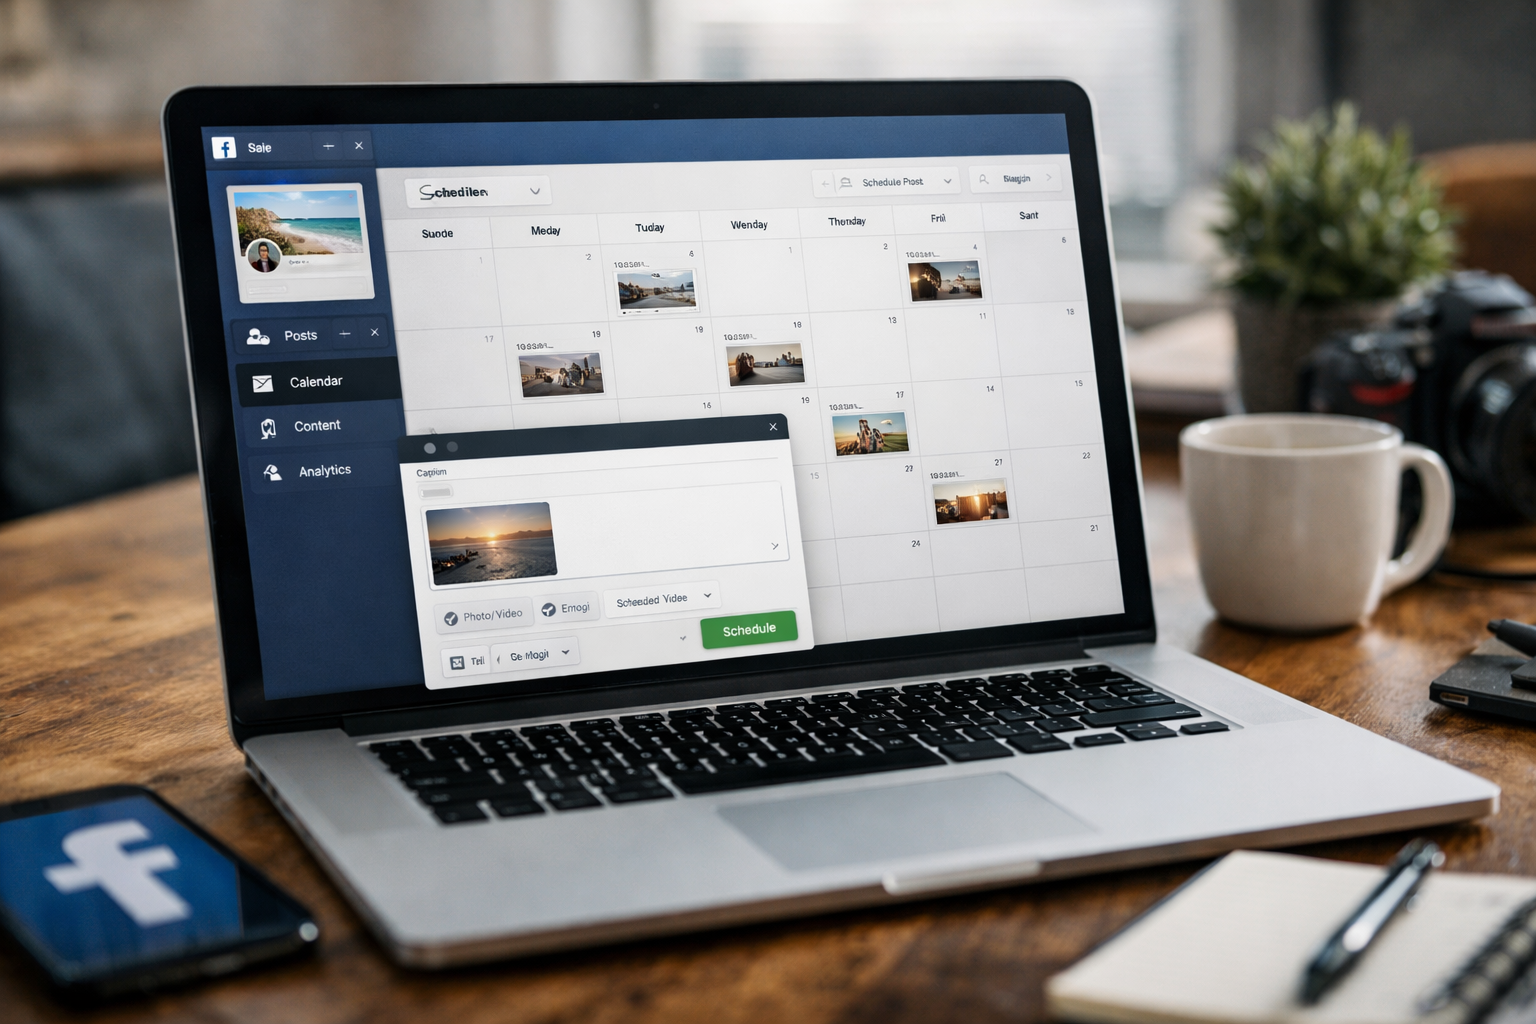
Learning how to use post planner for facebook can make Page management more organized, especially when you need to create content ahead of time instead of posting manually every day. Post Planner is a third-party social media scheduler built for engagement, with tools for content discovery, post creation, scheduling, categorization, and performance review.
This guide focuses on Facebook Pages, not personal Facebook profiles. I’ll walk through a practical workflow for connecting a Page, creating posts, scheduling content, curating ideas, and checking results. Facebook-native scheduling is also available through Meta Business Suite, but Post Planner can be useful when you want a broader content planning system.
Official website · Latest pricing & offers
What Post Planner Is and Who It’s For
A quick definition of Post Planner for Facebook
Post Planner is a social media scheduling platform designed to help marketers find, create, organize, schedule, and analyze social content. For Facebook Page managers, it can be used to schedule posts, reels, and stories to connected Pages.
When people ask how to use post planner for facebook, the simplest answer is this: connect your Facebook Page, create or curate content, select a publishing time, and review performance after posts go live.
Post Planner also supports other networks, including Instagram, LinkedIn, TikTok, Pinterest, YouTube, Threads, X, and others listed on its official site. Still, the workflow in this article stays focused on Facebook Page publishing.
When it makes sense versus Meta Business Suite
Meta Business Suite is Facebook’s native management environment. You can use it to publish content, review Page activity, and schedule posts directly through Meta’s tools.
Post Planner is a separate Facebook post scheduler. It may make more sense if you want content discovery, topic-based categories, a shared scheduling workflow, and the ability to manage multiple social networks from one platform.
For a simple Page with occasional posts, Meta Business Suite may be enough. For a more consistent publishing process, learning how to use post planner for facebook can give you a more structured content workflow.
Best use cases for page managers, agencies, and small businesses
Post Planner is most practical for people who need consistency without building every post from scratch at the last minute. That includes local businesses, creators, nonprofit Page managers, marketing teams, and agencies handling several client Pages.
It can be especially helpful if your weekly process includes:
- Finding relevant industry content to share
- Preparing posts in batches
- Organizing posts by topic or campaign
- Scheduling Facebook posts alongside other social platforms
- Reviewing engagement to refine future posts
How to Set Up Post Planner for Facebook
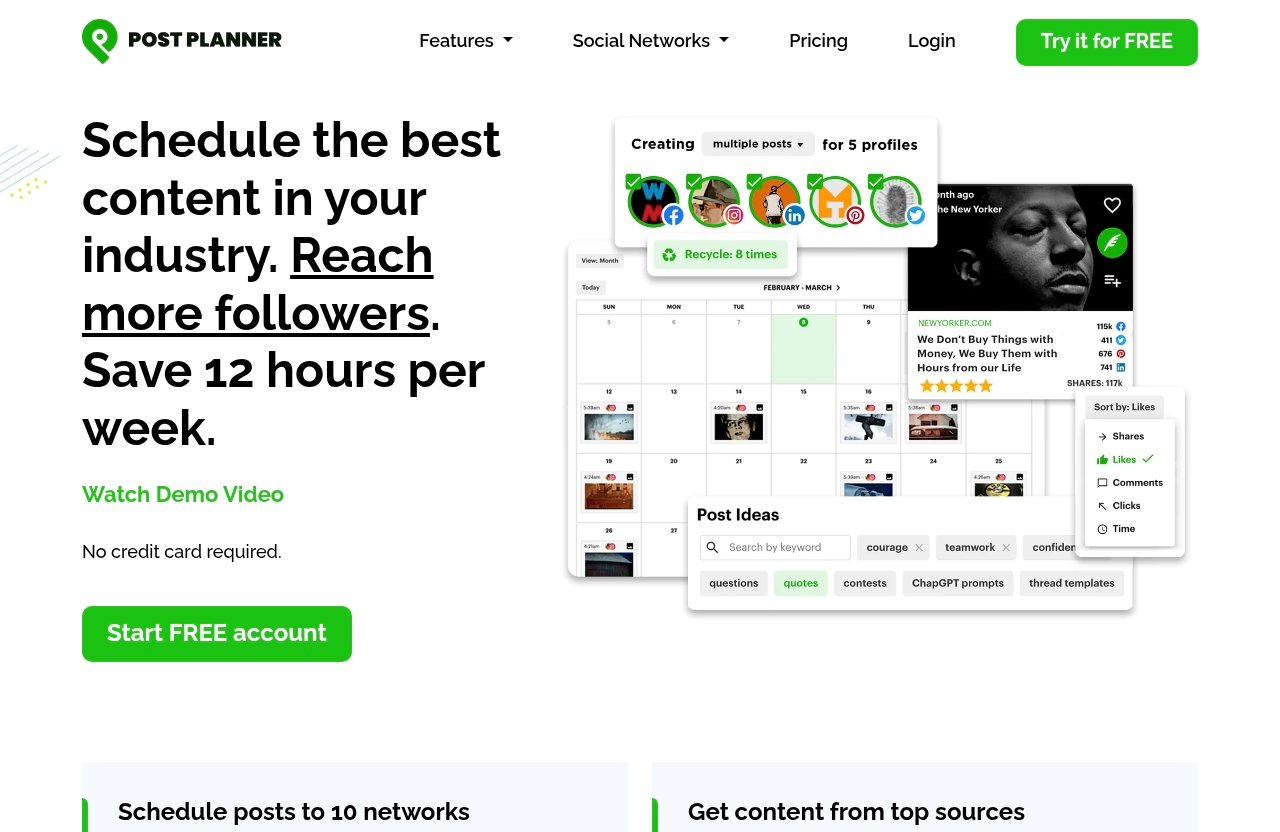
Create your Post Planner account
Start by visiting Post Planner and creating an account. The official site promotes a trial with no credit card required, although you should always review the current terms directly before registering.
If you want to test the workflow yourself, you can use this Post Planner link to visit the service. Treat it as a way to evaluate whether the interface and features fit your Page management process, not as a promise of specific results.
Connect your Facebook Page account
After signing in, look for the option to connect or add a social account. Select Facebook, then follow the authorization prompts presented by Facebook and Post Planner.
You should use the Facebook account that has the appropriate role or access to manage the Page you intend to connect. The exact authorization screens can change as Facebook updates its permissions process, so carefully read each prompt before approving access.
Confirm page permissions and access
A common issue when learning how to use post planner for facebook is discovering that the correct Page does not appear after connection. In most cases, that points to Page access or permission settings rather than a problem with the scheduler itself.
Before troubleshooting inside Post Planner, confirm that:
- You are logged into the correct Facebook account.
- That account has access to manage the intended Facebook Page.
- You approved the requested permissions during the connection process.
- You selected the correct Page if Facebook displayed more than one option.
If access was recently changed on Facebook, reconnecting the account after verifying your Page role may help refresh the connection.
Choose the page or pages you want to manage
Once connected, select the Facebook Page you want to use as a publishing destination. Give the Page a quick visual check before creating content, especially if you manage similarly named locations, brands, or client accounts.
This is a small but important habit. Scheduling the right message to the wrong Page is one of the easiest avoidable mistakes in a multi-Page workflow.
How to Create and Schedule a Facebook Post in Post Planner
Click Create Post
The core of how to use post planner for facebook is the post composer. In your Post Planner workspace, choose the option to create a new post.
Post Planner’s verified features include composing, optimizing, and previewing posts. Use the composer as your final workspace for checking copy, visuals, destinations, and timing before anything is scheduled.
Choose your Facebook destination
Select the connected Facebook Page where the post should appear. If you manage additional social channels, be deliberate about whether you are creating a Facebook-only post or adapting content for multiple destinations.
For beginners, I recommend starting with one Page at a time. It is easier to learn the interface and catch formatting issues when you are not trying to customize a single post for several platforms at once.
Add text, media, and links
Write the main caption first. Keep the opening line clear because it needs to earn attention quickly in the Facebook feed.
Then add the appropriate media or link. Depending on your content plan, that may be an image, video, article link, promotional graphic, event reminder, or simple text update.
A useful checklist before moving on:
- Make the first sentence specific and reader-focused.
- Keep paragraphs short and easy to scan.
- Confirm every URL works and points to the intended page.
- Use an image or video that supports the message.
- Check that your call to action fits the goal of the post.
Preview before publishing
Previewing is one of the most valuable steps in a Facebook publishing workflow. Review the post as a reader would, not as the person who wrote it.
Check for awkward line breaks, missing links, spelling issues, unclear wording, or media that does not match the post. If you are posting for a business, also verify names, prices, dates, phone numbers, and location details.
This preview habit is a major part of how to use post planner for facebook successfully. A scheduled post is convenient, but only if it is accurate when it reaches your audience.
Schedule for a future date and time
When the post is ready, choose the scheduling option instead of immediate publishing. Select the date and time you want the Page post to go live, then confirm the schedule.
Post Planner’s official feature list includes scheduling automation, so you can build a planned publishing calendar rather than relying on manual posting. Start with a manageable cadence, such as several quality posts each week, and adjust based on your capacity and results.
| Scheduling Step | What to Check |
|---|---|
| Destination | Correct Facebook Page selected |
| Copy | Clear hook, accurate details, working links |
| Media | Correct file and appropriate format |
| Time | Matches your audience and campaign timing |
| Preview | No errors before confirming |
How to Schedule Facebook Reels, Stories, and Other Formats
Schedule posts, reels, and stories to Facebook Pages
Post Planner’s official Facebook information states that users can schedule posts, reels, and stories to Facebook Pages. That gives Page managers more flexibility than relying on standard feed updates alone.
When researching how to use post planner for facebook, remember that this applies to Pages based on the verified product information. Do not assume that a third-party tool can publish the same way to a personal Facebook profile.
Use the composer for different content types
Choose the format that best suits the content you are publishing. A standard post may work well for announcements, links, and educational updates, while reels can be better for quick demonstrations, behind-the-scenes clips, or short tips.
Stories are often useful for timely, lighter-touch communication. Before scheduling, ensure the media, caption, and message match the format you selected.
If your goal is to schedule Facebook reels, keep the concept focused. A reel usually performs better when the viewer understands the point quickly instead of waiting through a long introduction.
When to publish short-form vs. standard posts
Use short-form video when you can show something, demonstrate a result, or deliver a fast insight. Use standard posts when readers need context, a clickable resource, an announcement, or a discussion prompt.
You do not need to force every idea into a reel. A balanced Facebook content plan might include short videos, image posts, curated links, customer stories, and occasional direct offers.
How to Curate Facebook Content Inside Post Planner
Find top content from Facebook Pages
One reason marketers explore how to use post planner for facebook is Post Planner’s content discovery focus. Its official features include finding high-quality content and viral post ideas.
Content discovery should not mean copying another Page’s work. Instead, use it to identify themes, headlines, questions, formats, and discussion angles that are relevant to your audience.
For example, a local fitness studio might find popular posts about beginner workouts, wellness myths, or meal preparation. The studio can then create its own useful version with its own experience, photos, and viewpoint.
Use content discovery to build a queue
A good Facebook content curation tool helps prevent the “what should I post today?” problem. As you discover useful ideas, save them to a working queue instead of trying to publish everything immediately.
Build a mix of original and curated material. Original posts establish your brand voice, while thoughtfully selected third-party resources can make your Page more consistently helpful.
When sharing outside content, always review the source, confirm it is still accurate, and add your own explanation about why it matters to your audience.
Reuse and repurpose high-performing ideas
You can also repurpose your own successful concepts. A well-received tip might become a reel, a graphic, a longer educational post, or a series of related updates.
Repurposing does not mean repeating identical content every week. It means taking a proven topic and presenting it in a fresh, useful way for people who may have missed the original post.
How to Organize a Facebook Publishing System
Use categories or buckets for content themes
Post Planner includes categorization tools that classify posts into topic-based buckets. This is helpful when you want your Facebook Page to feel balanced rather than overly promotional.
For example, a small business could create buckets such as:
- Helpful tips
- Customer stories
- Product education
- Community updates
- Promotions
- Seasonal content
Using categories is a practical next step after you understand how to use post planner for facebook at the individual-post level. It turns random posting into a repeatable editorial system.
Batch schedule multiple posts
Batching means setting aside one focused block of time to prepare several posts. I find this approach reduces rushed copy and makes it easier to see whether the upcoming schedule has too much of one content type.
Try a simple weekly routine:
- Collect ideas and source material.
- Draft several captions in one session.
- Add approved graphics or videos.
- Schedule posts across the week.
- Leave room for timely updates and live business news.
Batching does not require publishing every day. It simply gives you more control over your Page calendar.
Plan around campaign weeks and recurring posts
Use your calendar to map major promotions, launches, holidays, events, and seasonal topics. Then fill open dates with evergreen helpful content that remains useful regardless of the week.
Recurring post concepts can also save time. A weekly tip, monthly customer spotlight, or regular question can create familiar rhythms for your audience without making your Page repetitive.
Official website · Latest pricing & offers
How to Analyze Facebook Performance in Post Planner
Check post performance and engagement
Post Planner’s official feature list includes analyzing post performance and engagement. After content publishes, review what received meaningful responses from your audience.
Do not judge a post only by one outcome. A post designed to start a conversation may be successful for different reasons than a post designed to drive traffic to a specific resource.
Identify which post types work best
Look for patterns over several posts rather than reacting to one unusually strong or weak result. Consider whether images, reels, links, questions, educational tips, or customer-led posts appear to generate stronger engagement.
The goal of how to use post planner for facebook is not just scheduling in advance. It is creating a feedback loop: publish, observe, learn, and improve the next batch.
Keep simple notes on what you notice. For example, you may find that practical tutorials create more comments, while short videos attract more attention for product demonstrations.
Adjust timing and content based on results
Use your findings to refine posting times and formats. If your Page audience responds more actively at certain times, test scheduling similar content during those periods.
Avoid treating analytics as a magic formula. Audience behavior changes, and content quality still matters more than blindly copying a timestamp that worked once.
Post Planner vs Meta Business Suite: Which Should You Use?
Native scheduling basics
Facebook-native scheduling can be handled through Meta Business Suite. If you need to publish directly through Meta’s ecosystem, the Meta Business Suite schedule post workflow is a straightforward option for Page managers.
Meta Business Suite is also where many users look when trying to understand where to find scheduled posts on Facebook mobile. Menu names and layouts can vary by device and updates, but Page scheduling functions are generally accessed through Meta’s business and Page management areas.
Where Post Planner adds value
Post Planner adds a planning layer around publishing. Its verified features include content discovery, image design tools with stock media editing, topic-based categorization, post creation and previewing, scheduling, analytics, and mobile management.
It may be a better fit for marketers who want to manage Facebook alongside other supported networks or who need a more deliberate curation and batching process. It is not necessarily a replacement for every Meta tool; it is another option for managing the publishing workflow.
A simple decision guide for Facebook marketers
| Choose This Option | If You Primarily Need |
|---|---|
| Meta Business Suite | Native Facebook Page publishing and basic scheduling |
| Post Planner | Content curation, topic organization, cross-network planning, and scheduling workflow |
| Both | Native Meta access plus a broader content planning system |
For many beginners, the best approach is to try one workflow at a time. Learn where your scheduled posts live, how your Page permissions work, and which system helps you publish consistently.
Common Problems When Using Post Planner for Facebook
Facebook Page not connecting
If your Page does not connect, first verify that you are signed into the correct Facebook account. Then confirm that the account has the required ability to manage the Page.
If the connection screen seems incomplete, log out and back in, review the permissions prompt carefully, and try reconnecting. Avoid repeatedly authorizing random accounts, which can make it harder to identify the correct Page later.
Wrong page selected
If you manage multiple Pages, it is easy to schedule to the wrong destination. Always check the Page name and profile image inside the composer before confirming.
This is particularly important for agencies or businesses with separate location Pages. Build a habit of verifying the destination during both drafting and final preview.
Post not scheduling correctly
When a post does not appear to schedule, check whether the date and time were selected correctly and whether the post was fully confirmed. Also review whether the media and text meet the requirements shown in the composer.
If needed, simplify the post and try again. A short test post can help you determine whether the issue is the connection, the selected Page, or a specific media file.
Permissions and access issues
Facebook Page access can change when team members are added, removed, or assigned different roles. If you previously could schedule Facebook posts but now cannot, revisit your Facebook Page access settings first.
Do not share login credentials to solve access problems. Use Facebook’s appropriate business and Page access controls, then reconnect the authorized account in Post Planner if necessary.
Best Practices for Better Facebook Scheduling Results
Match posting times to audience activity
Start with a reasonable schedule based on when your audience is likely to be available. Then review engagement over time and test adjustments rather than assuming there is one universally perfect posting hour.
If you are learning how to schedule a Facebook post on mobile, the principle is the same: choose the Page, prepare the content, select a future time, and confirm it. Mobile convenience is useful, but take the same care with proofreading and destination selection.
Mix content formats
A healthy Page feed usually includes more than promotional graphics. Mix helpful tips, short videos, customer examples, curated resources, behind-the-scenes content, announcements, and questions.
Use reels when video is the strongest way to communicate an idea. Use standard posts when your audience needs details, links, or a conversation prompt.
Use strong hooks and first comments
The first line should tell people why they should care. Lead with a question, useful takeaway, surprising observation, common problem, or direct statement that fits the post.
If you add a first comment, make it useful rather than decorative. It might include a clarification, an additional resource, or a question that invites a genuine response.
Review before publishing
Never let scheduling replace editorial review. Check the Page destination, links, media, spelling, timing, and factual accuracy before confirming.
This final review is one of the simplest ways to improve results when using a Facebook Pages scheduler. Consistency matters, but trustworthy content matters more.
Final Verdict: Is Post Planner Worth It for Facebook?
Who benefits most
Post Planner is worth considering for Facebook Page managers who want a more organized content process. It is especially relevant for small businesses, agencies, and marketers who need discovery tools, content categories, scheduled publishing, and performance review in one workflow.
When it is the better choice
Post Planner can be the better choice when native scheduling alone feels too limited for your planning needs. Its strongest differentiators are its content discovery, content organization, broader network support, and scheduling-focused workflow.
If you only publish occasionally to one Page, Meta Business Suite may be sufficient. If you regularly plan content in batches and need fresh ideas, how to use post planner for facebook becomes a worthwhile skill to develop.
Quick recommendation for new users
Start with one Facebook Page and one week of planned content. Create a few posts, test a reel or story if appropriate, organize ideas into categories, and review engagement after publishing.
Post Planner’s official messaging says users can “Schedule better content. Reach more people. Save 12 hours per week.” Consider that marketing language, not a guaranteed outcome. The real value is whether the tool helps you build a reliable, reviewable Facebook publishing habit.
Official website · Latest pricing & offers
FAQ
How to use planner in Facebook?
To use Post Planner with Facebook, connect your Facebook Page, create a post, add copy and media, preview it, select a future publishing time, and confirm the schedule. This workflow is for Facebook Pages based on Post Planner’s verified Facebook capabilities.
How much does Post Planner cost?
Post Planner has an official “Plans & Pricing” page, but the verified information available here does not include current plan names, pricing amounts, or feature limits. Check the official pricing page directly for the latest confirmed details before choosing a plan.
Where did Planner go on Facebook?
Facebook’s native planning and scheduling tools are generally found in Meta Business Suite and Page management areas. Post Planner is separate from Facebook: it is a third-party scheduler that can help with Facebook content curation, scheduling, organization, and analysis.
How to use Facebook post scheduler?
Choose the correct Facebook Page destination, write your post, attach any media or links, preview the result, select a date and time, and confirm scheduling. You can do this in Meta Business Suite for native Facebook scheduling or use Post Planner if you prefer its broader planning workflow.
Related Reading
References
- To create a post in Meta Business Suite on desktop
- Schedule a post
- Schedule Facebook and Instagram content on Meta Business Suite mobile
- Facebook: Schedule Posts and Reels to your Pages and Groups