
Skool Tutorial: A Beginner’s Guide to Setting Up and Launching in 2026
If you are looking for a practical skool tutorial, the simplest place to start is this: Skool is a platform where you can run a community and deliver courses in one place. Instead of sending people to separate tools for lessons, discussions, and live interaction, you can organize your offer around a single group.
This guide walks through the full beginner path, from planning your idea and completing Skool sign up to inviting your first members. It is designed for creators who want a clear, low-pressure way to learn how to use Skool before trying to sell, teach, or grow a community.
Official website · Latest pricing & offers
What Skool Is and Who It’s For
Simple Definition of Skool
Skool is a community-focused platform that combines course delivery with member interaction. A creator can build a group around a topic, publish educational content, start conversations, and bring members together in one central space.
In practical terms, the Skool platform is useful when your content works better with discussion and accountability than with a course library alone. Members can learn from your lessons while also connecting with you and one another.
Who Should Use Skool: Creators, Coaches, Course Sellers, Communities
This skool tutorial is most relevant for creators, coaches, consultants, educators, and niche community builders. You might teach a professional skill, support a hobby-based group, offer coaching resources, or help members make progress toward a shared goal.
Skool can also suit course sellers who want to avoid the “buy it, watch it, forget it” pattern. A community layer gives learners a place to ask questions and share wins, which may make your program feel more active and useful.
What You Can Build on Skool: Communities and Courses
You can use Skool to create a free or paid community, a structured course, or a combination of both. For example, a fitness coach could publish beginner workouts as lessons while using the group for weekly check-ins and questions.
The best starting point is usually one clear transformation. Rather than building a broad “business community,” create a focused space such as “Freelance Writing Basics” or “Beginner Home Baking Skills.”
Skool Tutorial for Beginners: Quick Overview Before You Start
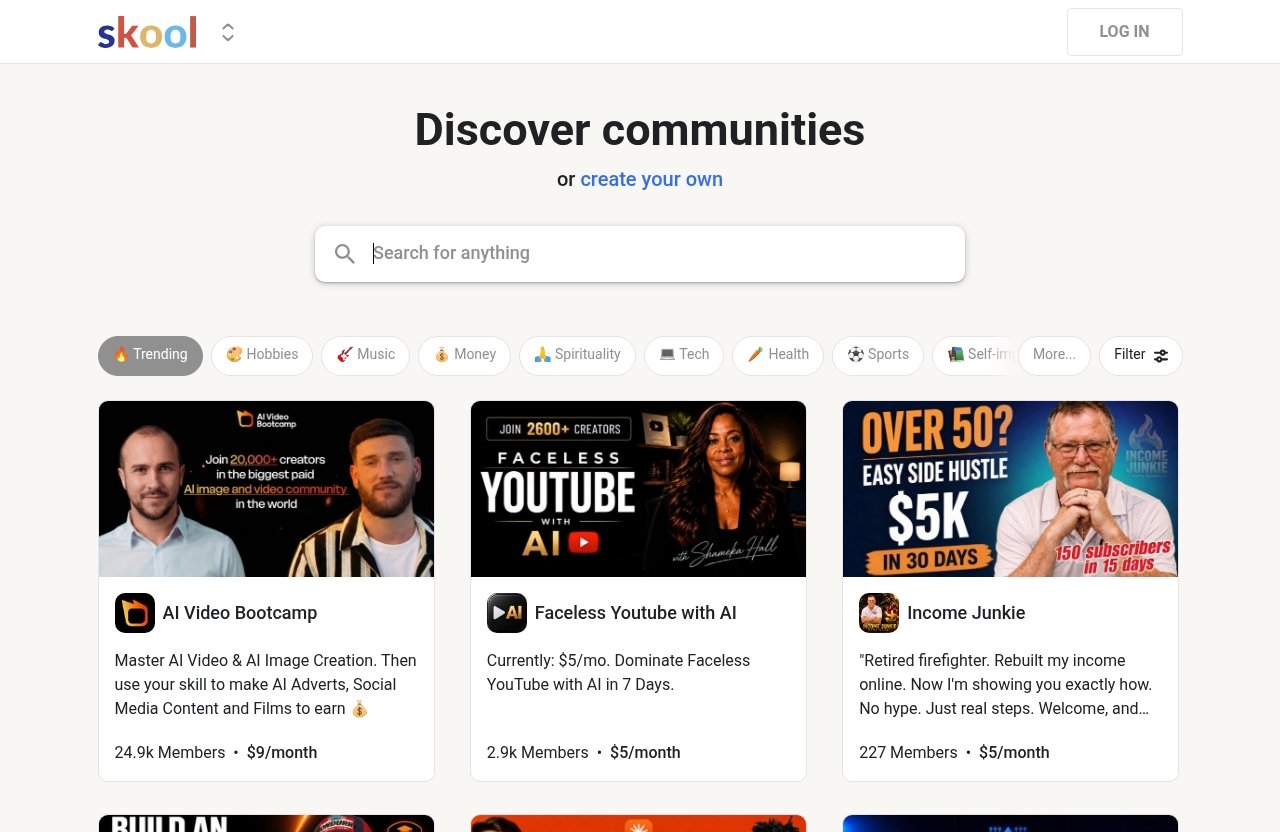
What You Need Before Signup
Before beginning Skool sign up, write down three things: who your group serves, the result you want to help them achieve, and the first problem you will solve. You do not need a huge audience, a finished course library, or perfect branding to begin.
A simple starting statement might be: “I help new photographers understand their camera settings through short lessons and weekly practice prompts.” This gives your group a clear purpose from day one.
What Happens After You Create an Account
After you create your account, your early work is about setting up the group foundation. You will choose a topic, create a simple welcome experience, add initial content, and decide who to invite first.
Treat your first version as a test, not a permanent final product. A good skool tutorial should help you move forward with a small, useful launch rather than delay everything while you build dozens of lessons.
Common Beginner Mistakes to Avoid
A frequent mistake is trying to serve everyone. A narrow starting audience makes it easier to write your description, plan your content, and invite relevant members.
Other common issues include launching without a welcome post, uploading too much content before gathering feedback, and waiting for a large audience before inviting anyone. Start with a specific promise and improve through real member questions.
Here is a simple roadmap for this guide:
- Define your group topic and audience.
- Set up the essential group details.
- Create a welcome post and starter content.
- Build a small first course.
- Invite a few people and run a focused first week.
- Review feedback before expanding.
How Skool Works
Community-First Structure
At its core, Skool is built around a group experience. The community is not simply an add-on to a course; it can be the place where members discuss lessons, ask for help, and stay engaged with the topic.
That community-first structure is worth considering if you want learners to interact rather than consume material alone. As you learn how to use Skool, think of your group as a guided environment, not just a content folder.
Courses, Posts, Events, and Engagement Tools
A typical Skool group can bring together courses, posts, events, and live interaction. This setup helps you separate evergreen learning materials from timely conversations and scheduled activities.
For beginners, keep the roles clear. Use course content for step-by-step teaching, posts for updates and discussion prompts, and live calls or events only when you have a useful reason to bring people together.
How Members Move Through a Skool Group
Members generally join your group, read the welcome information, explore the available content, and participate in conversations according to your setup. Their experience depends heavily on the path you create for them.
A helpful first path could be: join the group, introduce yourself, complete one short lesson, and answer one discussion question. This skool tutorial approach gives newcomers an immediate action rather than leaving them unsure where to begin.
Step-by-Step Skool Setup Tutorial
Create Your Skool Account
Begin with Skool sign up and follow the account-creation process shown on the platform. Use an email address you check regularly, especially if you will be managing member questions or launch-related communication.
Once your account is ready, avoid rushing into design decisions. First, decide what the group is about and what a new member should understand within the first few seconds of arriving.
Choose Your Group Topic and Positioning
Your positioning is a concise explanation of who the group serves and why it exists. It should answer: “Is this for me?” and “What will I get from joining?”
Use this basic formula:
A community for [specific person] who want to [specific outcome] without [common obstacle].
For example: “A community for new nutrition coaches who want to build simple client systems without getting overwhelmed by software.” Specific positioning makes your Skool community setup much easier because it guides every later decision.
Set Up Your Group Basics
Your group basics should make a good first impression without requiring elaborate design work. Focus on clarity over cleverness.
Use this setup checklist:
| Group Element | Beginner-Friendly Approach |
|---|---|
| Group name | Make the topic clear and memorable |
| Description | Explain the audience, outcome, and main activities |
| Visual identity | Use a clean image that fits the topic |
| Rules | Keep them short, respectful, and practical |
| Welcome path | Tell new members what to do first |
| First offer | Start with one focused course, resource, or challenge |
This part of the skool tutorial is where many creators overthink things. Your name and description can evolve later, but your first version should be understandable to the exact people you hope to help.
Add Your First Members
Do not begin by inviting everyone you know. Invite people who genuinely fit the group topic, such as past clients, engaged social followers, colleagues, friends with relevant interests, or email subscribers who have asked about the subject.
Send a personal message rather than a generic announcement. Explain why you are inviting that individual, what the group covers, and what kind of early feedback would help you improve it.
Your first members are not just numbers. They are the people who can reveal whether the group language, lesson structure, and onboarding steps are clear.
Create Your First Post and Welcome Message
Your first post should reduce uncertainty. Welcome members, explain the group’s purpose, and give them one simple action to take.
A useful welcome message includes:
- A quick introduction to you and the group.
- The result members can work toward.
- A request for new members to introduce themselves.
- A link or direction to the first lesson or resource.
- A question that starts conversation.
For example: “Welcome! Share your current goal and the biggest obstacle you are facing this week.” A post like this is easy to answer and gives you material for future lessons and discussions.
How to Build Your First Course in Skool
Plan a Simple Course Structure
A Skool course tutorial does not need to begin with a large, complex curriculum. Start with a short outcome-based course that helps a new member make one meaningful improvement.
Plan three to five lessons around a single process. If you teach podcasting, your first course could cover choosing a topic, planning an episode, recording a basic version, and publishing a first episode.
Upload Lessons and Organize Modules
Give every lesson a clear title that describes the outcome. “Choose Your Topic” is more helpful than “Module One,” because learners immediately know why the lesson matters.
Keep early lessons concise and practical. You can use written instructions, videos, worksheets, or prompts, but do not add formats simply because they seem impressive. The best material is the material your beginner can use.
This skool tutorial principle matters: organize lessons in the order a learner needs them, not in the order you created them. Test the flow yourself from the perspective of someone with no prior knowledge.
Unlocking and Access Basics
Before publishing, decide how members should access your material. Keep the initial access path simple, especially if this is your first group.
Your goal is to avoid confusion about where people should begin. Clearly label your starter course, point to it in the welcome message, and explain whether members should complete the lessons in sequence.
Best First-Course Format for Beginners
A strong first course is often a “quick-start” program. It addresses a problem your members want solved soon and gives them a visible result within a manageable amount of time.
Good starter formats include:
- A five-step beginner roadmap.
- A seven-day implementation challenge.
- A foundational skills mini-course.
- A setup guide with templates or checklists.
- A short “start here” training series.
Avoid making your first course a complete encyclopedia. Build the first version, listen to questions, and add lessons when you know what your members actually need.
How to Launch Your Skool Community the Right Way
Pre-Launch Checklist
Before you announce your group publicly, review the member experience from start to finish. Join your own group mentally as a new person and ask whether the next step is obvious.
Check that you have:
- A clear group name and description.
- A concise welcome message.
- At least one useful discussion post.
- A first course, resource, or guided activity.
- Basic community expectations.
- A personal invitation message for early members.
A thoughtful skool tutorial launch is not about creating a dramatic opening day. It is about making sure early members encounter a useful, welcoming experience.
Your First 7 Days Plan
For the first week, focus on presence and conversation. Do not expect the group to run itself before members understand what participation looks like.
| Day | Practical Focus |
|---|---|
| Day 1 | Welcome members and ask introductions |
| Day 2 | Share a quick tip or short lesson |
| Day 3 | Ask a focused question about a common challenge |
| Day 4 | Respond personally to active members |
| Day 5 | Share a practical prompt, checklist, or discussion |
| Day 6 | Highlight a member insight or common question |
| Day 7 | Ask what members want help with next |
This schedule is flexible. The important point is that members see consistent guidance, not a silent group after joining.
How to Get the First 3 Members and Early Engagement
Your Skool first members should ideally be people who match your intended audience and are willing to give honest feedback. Aim for conversations, not vanity metrics.
Reach out individually and make the invitation relevant. You might say that you are building a small group around a topic they have mentioned before, and that you would value their perspective as an early participant.
When they join, ask specific questions. “What are you currently struggling with?” is more likely to start a useful exchange than “What do you think of the community?”
Ways to Create Momentum Without an Audience
You do not need a large following to start. You can begin with people already in your network, helpful conversations in relevant spaces where promotion is allowed, partnerships with complementary creators, or a small free workshop that leads into your group.
The practical lesson from this skool tutorial is to build proof through usefulness. A handful of engaged members and clear feedback can be more valuable than a larger but inactive group.
Official website · Latest pricing & offers
Skool Pricing Explained for Beginners
Hobby Plan Overview
According to the official Skool pricing page, the Hobby plan is listed at $9 per month. It includes unlimited members, unlimited courses, unlimited videos, unlimited live calls, a custom URL, and affiliates, with a 10% transaction fee.
The official pricing page also displays monthly and yearly toggles and states “2 months free!” Review the current page directly before making a decision, since pricing displays and billing options can change.
Pro Plan Overview
The official Skool pricing page lists the Pro plan at $99 per month. It includes unlimited members, unlimited courses, unlimited videos, unlimited live calls, a custom URL, and affiliates, with a 2.9% transaction fee.
The key pricing difference shown on the official page is the monthly price and transaction fee. Beginners should evaluate both figures in the context of their own planned offer and expected sales activity.
Which Plan Is Better for a Beginner
For a beginner comparing Skool pricing, the Hobby plan may be the simpler starting point if you want to test a group concept with a lower monthly listed price. However, the right choice depends on your budget, pricing model, and how you expect to use the platform.
Do not choose a plan only because it sounds more advanced. Start by calculating your likely monthly costs, including the displayed transaction fee, and consider what you truly need for your first launch.
When the Upgrade Makes Sense
An upgrade can be worth evaluating when the difference in transaction fees and plan cost makes practical financial sense for your situation. There is no universal threshold because each creator’s offer, member volume, and revenue model differ.
If you are ready to explore the platform after reviewing the official details, you can use the publisher’s Skool affiliate link. This is an affiliate link, so toptrustreview.com may earn a commission if you take qualifying action through it, at no extra cost stated here.
Skool Features That Matter Most in a Beginner Tutorial
Unlimited Members and Courses
The official Skool pricing page lists unlimited members and unlimited courses on both Hobby and Pro. For a new creator, this means you can focus on shaping your group and course structure without needing to plan around the member or course limits listed in the provided plan details.
That does not mean you should launch everything at once. A better approach is to start with one strong course and expand based on member needs.
Unlimited Videos and Live Calls
Both plans on the official pricing page list unlimited videos and unlimited live calls. These Skool features give creators options for teaching through recorded content and real-time interaction.
For a beginner, choose the format you can deliver consistently. Recorded lessons can work well for repeatable instruction, while live calls can be useful when discussion, coaching, or questions add clear value.
Custom URL
The official pricing page lists a custom URL on both Hobby and Pro. A clear, relevant URL can make your group easier to share and more consistent with your brand.
Keep it simple and easy to spell. Use a name connected to your group topic rather than a vague or overly clever phrase that new members may not remember.
Affiliates and Transaction Fees
Affiliates are listed on both official Skool plans. The pricing page shows a 10% transaction fee for Hobby and a 2.9% transaction fee for Pro.
Before relying on an affiliate approach, make sure your offer is clear and your member experience is solid. Referral activity tends to work better when early members understand the value of the community and can describe it honestly.
Is Skool Worth It for Beginners?
Best Use Cases
A balanced Skool review starts with use case rather than hype. Skool may be worth considering if you want a combined place for community interaction and course delivery, especially when discussion and accountability support the learning outcome.
It can be a practical fit for coaches, skill teachers, membership builders, and creators with a focused topic. The platform is most useful when you have a defined audience and a clear reason for members to participate regularly.
Who May Not Need Skool Yet
You may not need Skool immediately if you have not decided what you teach, who you serve, or why people would join. A platform cannot replace an offer or create demand by itself.
You may also want to pause if you are not prepared to communicate with early members. A community needs guidance, particularly at the beginning, even if your course content is strong.
Pros and Limitations to Consider
The main benefit is the ability to bring community and courses together. This can make the member experience easier to understand than using disconnected tools.
The limitation is that you still need to create useful content, invite the right people, and maintain engagement. This skool tutorial can guide your launch process, but it cannot guarantee members, revenue, or long-term activity.
Troubleshooting Common Beginner Issues
If Your Setup Feels Confusing
Reduce the number of choices. Start with one audience, one promised result, one welcome post, and one starter course.
Write down the first three actions a member should take after joining. If you cannot explain those actions simply, simplify your Skool community setup before adding more content.
If No One Joins at First
A slow start is common and does not automatically mean your idea is weak. Review whether your invitation clearly explains who the group is for and what members receive.
Personally invite a few relevant people and ask for feedback. The goal is not to pressure anyone; it is to learn whether your message and offer are understandable.
If Your Course Looks Too Empty
An empty-looking course can feel uncomfortable, but adding rushed lessons is not the answer. A short, organized starter course is more useful than a large collection of unfinished material.
Use member questions to guide your next additions. This is one of the most practical ways to improve your Skool course tutorial content over time.
If You Are Unsure What to Post First
Start with a question that exposes a shared need. Ask members about their current goal, biggest obstacle, or what they want to learn next.
Then respond to what people say. The earliest posts do not need to be groundbreaking; they need to show that the group is active, relevant, and welcoming.
Final Launch Checklist
Account Set Up
- [ ] Complete Skool sign in and account access checks.
- [ ] Confirm your group name and basic description.
- [ ] Review your group from a new member’s perspective.
- [ ] Keep your topic narrow enough for beginners to understand.
Group Topic Chosen
- [ ] Identify the specific audience.
- [ ] State the outcome you help them pursue.
- [ ] Explain why the community exists.
- [ ] Make sure your invitation matches this positioning.
Welcome Post Published
- [ ] Introduce yourself and the group purpose.
- [ ] Tell members what to do first.
- [ ] Ask an easy introduction question.
- [ ] Set a friendly, constructive tone.
First Course or Offer Added
- [ ] Publish one focused starter course or resource.
- [ ] Organize lessons in a clear order.
- [ ] Make the first lesson easy to begin.
- [ ] Avoid waiting for perfection before launching.
First Members Invited
- [ ] Invite a few people who fit the topic.
- [ ] Personalize each invitation.
- [ ] Ask for honest feedback.
- [ ] Plan your first week of posts and responses.
A successful skool tutorial launch is usually simple: define a focused promise, create a welcoming first experience, publish useful starter material, and listen closely to your early members. Start small, stay consistent, and improve the group based on real participation.
Official website · Latest pricing & offers
FAQ
Is It Worth It to Teach on Skool?
Teaching on Skool can be worth it if you want to combine course delivery with an active community experience. The value depends on having a clear offer, useful teaching material, and a realistic plan for attracting and supporting members.
Is Skool a Legit Way to Make Money?
Skool is a platform, not a guarantee of income. A creator’s results depend on the audience they serve, the value of the offer, their pricing approach, and how consistently they market and support the community.
How Exactly Does Skool Work?
Skool combines community interaction, courses, posts, and live engagement in one place. Members join a group, access content based on the creator’s setup, and can participate in the group experience around that content.
What Are the Cons of Skool?
Beginners may face a learning curve while setting up their group and creating a clear member journey. Building engagement also takes time, and creators should review Skool pricing, transaction fees, and their own business needs before choosing a plan.
Related Reading
- How Much Does Skool Cost in 2026? A Clear Pricing Guide
- Skool for Digital Products: An Honest 2026 Review for Creators
- Best Systeme.io Features for Beginners
References
- Skool 101 – Skool Help Center
- Skool Help Center
- Skool: Discover Communities or Create Your Own
- How To Create A Course On Skool 2026 (Skool Course Tutorial)