Cloudways Staging: How to Test Changes Safely Before Going Live
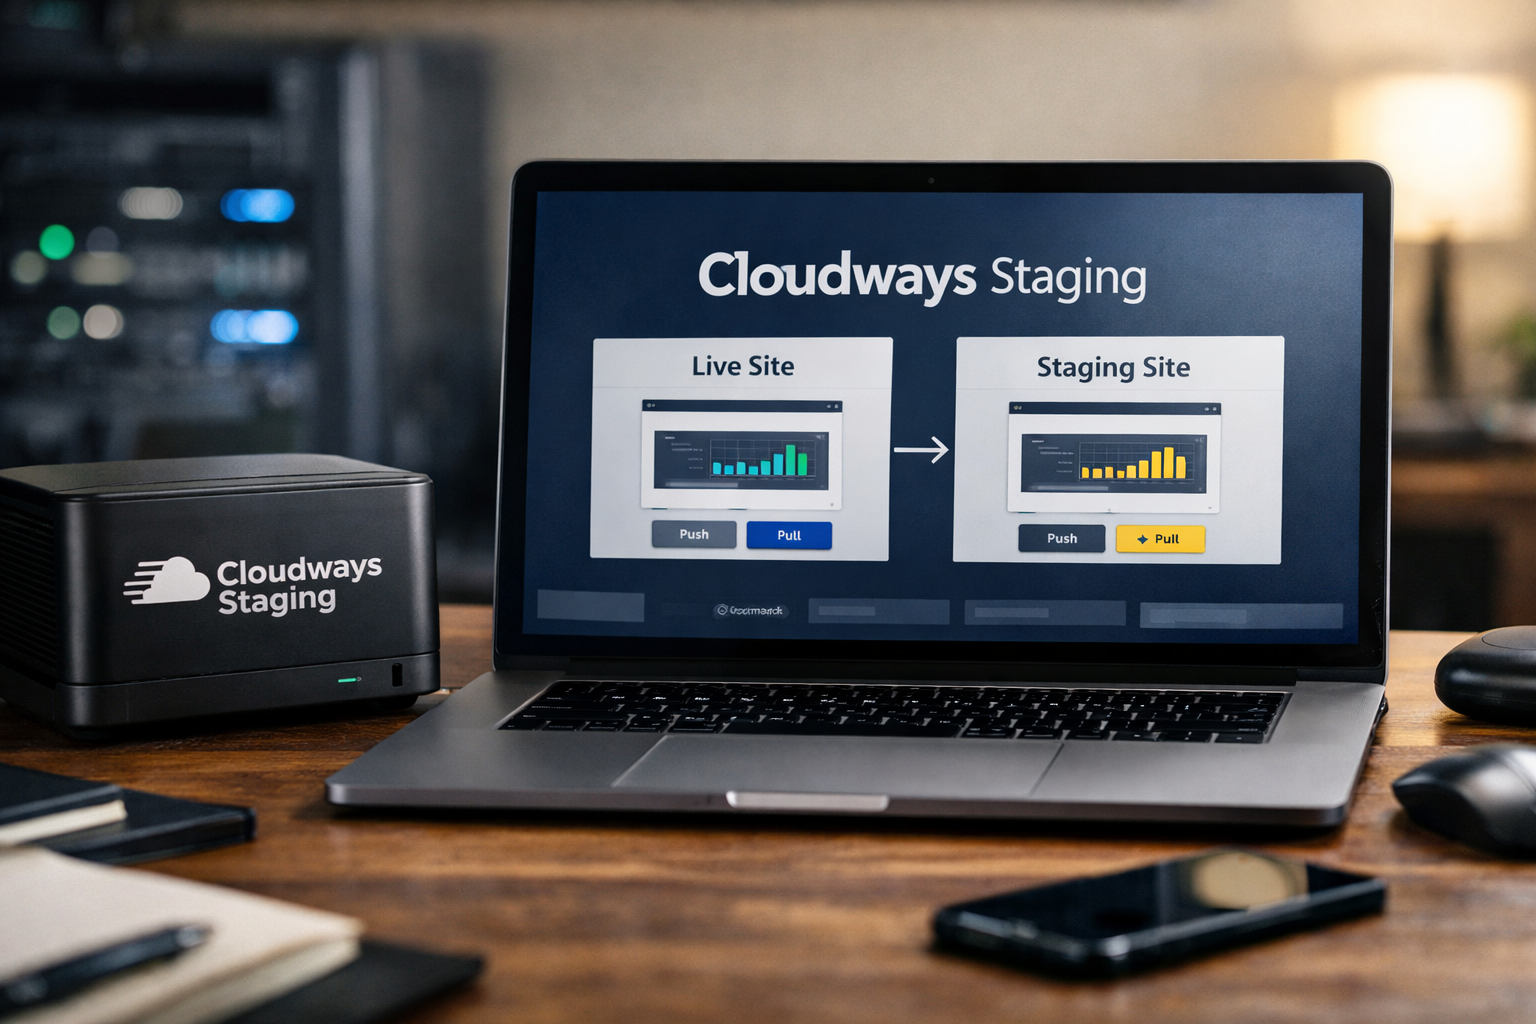
A plugin update looks harmless until it breaks a checkout page, hides a mobile menu, or conflicts with a custom theme function on a live site. That is exactly the risk a cloudways staging workflow is designed to reduce: you test the change on a separate copy first, review the result, and only then plan the production deployment.
For WordPress users, agencies, freelancers, and developers, this is one of the most practical habits for safer releases. Whether you are updating WooCommerce, changing CSS, installing a security plugin, or deploying custom code, a staging website gives you a controlled place to find problems before visitors do.
Official website · Latest pricing & offers
What Cloudways Staging Environment Is and Why It Matters
Simple definition of staging in Cloudways
A cloudways staging environment is a separate testing copy of an application. It is intended to resemble the live application closely enough that you can test updates, themes, plugins, code, and configuration changes without immediately affecting the public site.
In simple terms, production is what customers and visitors see. Staging is where you make mistakes safely, inspect the outcome, fix issues, and get approval before a release.
For a WordPress site, this often means creating a WordPress staging site, applying an update there, and checking the front end, admin area, forms, and important user journeys. The goal is not to eliminate every possible risk; it is to identify the preventable issues before they reach production.
Why staging reduces live-site risk
Working directly on a live website creates avoidable pressure. A small change to a plugin, page builder setting, or PHP snippet can affect caching, styling, payment flows, redirects, or site performance.
Using cloudways staging creates a more disciplined release process:
- Make one planned change at a time.
- Test the affected pages and functions.
- Record what changed.
- Get stakeholder approval when required.
- Deploy carefully and verify the live result.
This approach is especially valuable when several people touch the same site. A developer may be changing code while a marketing team edits landing pages and a store manager updates products. Testing first helps keep those changes from colliding unexpectedly.
Who benefits most: agencies, developers, site owners
Agencies benefit because a cloudways staging site gives clients a preview area for reviewing new designs, features, and content changes. It can reduce vague feedback because clients can test a working version rather than react to screenshots alone.
Developers benefit because staging supports controlled debugging. Instead of trying to diagnose an issue under live traffic, they can reproduce the problem, inspect the code change, and retest without disrupting users.
Site owners benefit because safe update testing does not require advanced development work. If you manage a WordPress site yourself, staging is a sensible first stop before updating plugins, WordPress core, or a theme that supports key business functions.
How Cloudways Staging Works
One-click staging creation
Cloudways provides staging management through its platform workflow. Official Cloudways support guidance directs users to Staging Management and then Launch Staging Application to begin creating the test copy.
That process is useful because it avoids building a separate staging website manually from scratch. Rather than installing WordPress again and attempting to copy content by hand, you can start from the existing application structure.
A cloudways staging workflow should still include review after creation. Confirm that the test application opens correctly, that the expected content appears, and that you know which URL is staging before making changes.
Same-server staging approach
When launching a staging application, Cloudways asks you to select the server for the staging application. Keeping the test environment close to the live setup helps make your results more meaningful.
A staging environment is most useful when the application version, plugins, theme, and data structure broadly reflect what is actually running in production. Testing an update on a completely unrelated setup may not expose the same compatibility issues.
This does not mean staging is identical to live in every operational respect. Traffic patterns, third-party systems, real customer data, and live transactions require separate caution.
Cloning files and database for realistic tests
A practical staging copy includes the application files and database content needed to reproduce the site’s behavior. That matters for testing theme templates, menus, user roles, product pages, form fields, and custom functionality.
For example, a WooCommerce update may appear successful on an empty test installation but fail when it encounters your actual shipping logic, product variations, or custom checkout fields. A realistic cloudways staging environment makes that kind of issue easier to spot.
Before you test, remember that copied data can be sensitive. Avoid treating staging as a public demo site, and use appropriate care with personal information, customer records, login accounts, and API-connected services.
Step-by-Step: How to Create a Cloudways Staging Environment
Log in to the Cloudways platform
Start by signing in to the Cloudways platform and locating the server that hosts the application you want to test. Before creating a test copy, take a moment to identify the live application clearly.
This small check prevents a common operational mistake: creating or modifying a staging application for the wrong site. If you manage many client sites, use a naming convention that identifies the client, project, and environment.
Go to Server > Applications > Staging Management
To follow the official support flow for cloudways staging, navigate to the relevant server and application, then open Staging Management. This is the area Cloudways identifies for staging-related actions.
The core path is:
- Select the appropriate server.
- Open the relevant application.
- Go to Staging Management.
- Choose Launch Staging Application.
This is the basic answer to “how to create a staging site in Cloudways” without relying on workarounds or manual duplication procedures.
Launch the staging application and select the server
Choose Launch Staging Application and select the server for the staging application. Review the application and server selections carefully before confirming.
Once launched, allow yourself time to validate the copy rather than jumping immediately into updates. Open the site, sign in to the administration area, and compare a few core pages with the live site.
A simple first-pass validation includes:
- Homepage and primary navigation
- Key landing pages
- Contact forms
- Logged-in user experience, if relevant
- Store pages and cart behavior for WooCommerce
- Custom post types, templates, and search
Verify the staging URL and access credentials
After creating the cloudways staging site, verify its URL and administration access. Save the details in your project documentation so nobody confuses the test site with production later.
Use visible internal labels where possible, such as “Staging,” in project notes and client communications. If a team member sees an unfamiliar URL, they should be able to identify its purpose immediately.
Do not assume every external connection is safe to test just because the site is on staging. Payment gateways, email delivery tools, analytics scripts, CRM integrations, and automation platforms may need separate test settings or temporary disconnection.
What You Can Safely Test on Staging
WordPress core, theme, and plugin updates
Cloudways staging WordPress workflows are particularly useful for plugin, theme, and core updates. Updates can fix bugs or improve compatibility, but they can also introduce conflicts with older extensions, custom code, or page-building tools.
Test updates in a deliberate order. Start with the change you need, then check the pages and features that depend on it. If multiple updates are pending, avoid installing all of them at once unless you have a clear reason and a reliable way to isolate a problem.
For a plugin update, check both visual and functional results. A page may look normal while a form submission, booking widget, membership restriction, or checkout calculation fails behind the scenes.
Custom code and CSS changes
A cloudways staging workflow is ideal for custom PHP, JavaScript, CSS, template overrides, and theme edits. Even a seemingly minor CSS rule can unexpectedly affect responsive layouts, popups, menus, or editor blocks.
Use staging to test changes across important browser widths. Review headers, footers, hero sections, product grids, tables, accordions, and any page with custom styling.
For code changes, document the purpose of each update. A short note such as “Fixes mobile overlap on product variation selector” is far more useful than “CSS changes” when someone needs to troubleshoot later.
WooCommerce checkout and form flows
WooCommerce deserves special attention because visual checks alone are not enough. Test product selection, variations, cart updates, coupons, shipping displays, account pages, and checkout-related behavior.
For forms, submit a test entry and confirm that validation, confirmation messages, notifications, and connected workflows behave as expected. Do not send real customer information through a test environment.
A cloudways staging environment is also useful for checking redirects after permalink changes, migration work, or SEO-related updates. Test the most important old URLs as well as the expected destination pages.
Performance, caching, and security settings
Staging can help you assess whether a change causes obvious performance or functionality issues. For instance, you may check whether pages load correctly after a caching-related adjustment or whether a security setting blocks legitimate admin actions.
Be careful when interpreting test performance. Staging does not necessarily reproduce real production traffic, visitor locations, external service response times, or concurrent user behavior.
Treat it as a functional and configuration test environment first. Use it to catch broken assets, JavaScript errors, cache-related display problems, login issues, and accidental access restrictions before deployment.
Best Practices for Testing Changes Without Breaking Production
Use a testing checklist
The strongest cloudways staging process is repeatable. Instead of relying on memory, use a checklist that matches the site’s purpose and update type.
Pre-launch staging checklist
Before approving any production deployment, check:
- The intended update or code change is documented.
- The staging site opens and displays expected content.
- Desktop and mobile layouts have been reviewed.
- Key pages have been tested while logged out.
- Forms submit and show correct validation messages.
- WooCommerce cart and checkout paths have been checked, where applicable.
- Important redirects work.
- No obvious PHP, JavaScript, or styling errors appear.
- Any client or internal stakeholder approval is recorded.
- A rollback plan is understood before live deployment.
A checklist is not bureaucracy. It is a way to make routine work safer when deadlines are tight.
Back up before major changes
Staging reduces risk, but it does not replace a backup and rollback plan. Before major changes to production, ensure you have a current recovery option consistent with your hosting and site-management process.
This is especially important for database changes, bulk plugin updates, theme replacements, WooCommerce changes, and custom code deployments. If a release causes an unexpected problem, a known recovery path turns a stressful incident into a manageable task.
Test on mobile and desktop
A staging website should be tested on more than one screen size. Mobile issues often emerge from navigation behavior, touch targets, sticky elements, form layouts, popups, and responsive CSS rules.
Do not limit the test to the homepage. Check the pages where people take action: contact pages, pricing pages, booking forms, product pages, cart pages, and checkout.
Validate forms, payments, and redirects
Functional testing should follow the visitor journey. If your site generates leads, test the lead form. If it sells products, test the cart and checkout path using appropriate test procedures. If it depends on redirects, test the old and new URLs.
Never assume a successful plugin update means the full customer experience remains intact. The most damaging problems often occur at the final step of a conversion path.
Document every change before deployment
Record what changed, why it changed, who tested it, and what still needs verification after release. This is particularly useful for agencies and teams with several contributors.
A short deployment record can include the date, affected URLs, plugin or theme version, testing result, approver, and rollback notes. This creates continuity if another person needs to investigate a problem later.
Official website · Latest pricing & offers
How Agencies, Developers, and Site Owners Should Use Staging Differently
Agencies: client approvals and pre-launch QA
For agencies, cloudways staging is often the bridge between internal quality assurance and client approval. It gives clients a controlled place to review a redesign, new landing page, content update, or feature before it is visible to the public.
Set clear expectations with clients. Explain that the staging link is for review, list the areas that need approval, and request feedback by a defined date. This keeps “looks good” feedback from becoming vague approval that later turns into revision requests.
Developers: code review and deployment confidence
Developers should use staging as part of a release workflow, not merely as an emergency debugging location. Test changes after code review, validate dependencies, and reproduce reported issues before applying a fix to production.
If your workflow includes Cloudways deployment via Git, keep the environment distinction clear. Review the intended branch, deployment target, configuration requirements, and post-deployment checks before making production changes.
The practical objective is confidence, not perfection. A controlled test cycle catches many issues early and makes live troubleshooting less likely.
Site owners: plugin updates and content changes
Site owners can use a cloudways staging site for changes that may look routine but affect business operations. Plugin updates, theme updates, page builder edits, new tracking scripts, membership tools, and form changes all deserve a quick test.
Content-only changes may not always require extensive QA, but staging is helpful when pages use reusable templates, dynamic content, complex layouts, or conversion tools. If one edit affects a global template, it can affect far more pages than expected.
Cloudways Staging vs Live: What Changes and What Should Stay Separate
What gets copied into staging
The purpose of a cloudways staging environment is to create a usable copy of the application for testing. That lets you work with a version that resembles the production site instead of an empty installation.
Still, consider the copy a point-in-time test environment. The longer it sits without being refreshed, the more it can drift from production as content, products, plugins, and configuration change on the live site.
What should never be tested blindly
Do not assume a copied site can interact freely with live external systems. Review payment processing, transactional email, webhooks, CRMs, analytics, inventory tools, newsletters, and any automation that could send messages or create real records.
Also avoid exposing sensitive data unnecessarily. Restrict staging access, use test accounts where appropriate, and make sure team members understand that the test environment is not a public-facing sandbox.
One more important distinction: live orders, leads, comments, and user actions continue to happen while you test. A staging copy does not automatically represent activity that occurs after it was created.
When to refresh staging from live
Refresh the staging website when the existing copy is too old to support meaningful testing. This is common after a busy sales period, a major content launch, extensive product changes, or significant plugin updates on production.
Before refreshing, preserve any staging-only work you still need. Teams sometimes lose valuable test changes because they refresh an environment without documenting or exporting the work in progress.
Common Cloudways Staging Mistakes to Avoid
Testing with outdated data
An old staging copy can create false confidence. A checkout test may pass on staging because the current production products, shipping rules, customer fields, or integrations are no longer represented accurately.
For meaningful cloudways staging tests, refresh when the data gap could affect the change you are validating. The more business-critical the release, the more important current context becomes.
Forgetting to re-check after push live
A successful staging test is not the final step. Production can behave differently because of live caching, DNS behavior, traffic, connected services, or a missed deployment detail.
Post-deployment verification checklist
After releasing a change, verify:
- The live homepage and key conversion pages load.
- The intended update is visible in production.
- Forms and primary calls to action work.
- Cart and checkout behavior work for stores.
- Mobile layouts remain usable.
- Redirects and critical URLs resolve correctly.
- No unexpected error messages appear.
- Monitoring and team notifications are checked.
This final pass is where a careful cloudways staging tutorial becomes a complete release habit rather than a one-time setup task.
Skipping backups
Skipping a backup or recovery check because staging looked fine is risky. Staging helps identify issues before deployment, but it cannot guarantee that every live variable is reproduced.
Keep staging, backups, and rollback planning together. They are complementary safeguards, not interchangeable ones.
Confusing staging URLs with production
Mixing up URLs can lead to the wrong site being edited, shared with a client, or tested with live credentials. This is especially common when agencies manage multiple similar installations.
Use clear naming, maintain a simple environment inventory, and make the production URL unmistakable in internal documentation. Small operational habits prevent expensive errors.
When Staging Is Not Enough: Add Backups and Monitoring
Why staging complements backups
A cloudways staging workflow helps prevent bad changes from reaching production. Backups help recover when a change, deployment, or external issue still causes trouble.
Neither tool replaces the other. Staging is proactive: it lets you test first. Backups are reactive: they provide a recovery option if the live site needs to be restored.
How backups help if a test goes wrong
A test may reveal that an update is unsafe, which is the best possible outcome because nothing has changed on the live site. But a problem can still occur during or after deployment, especially when databases, third-party services, or time-sensitive content are involved.
Before making high-impact changes, verify your own backup procedures and know who is responsible for recovery. Document the decision point for rolling back rather than trying to fix a severe issue under pressure.
Monitoring after deployment
Monitoring is the final layer of a safe release process. After deployment, watch the pages and actions that matter most to the business: lead forms, checkout paths, login areas, booking flows, and critical landing pages.
Monitoring can include uptime checks, error reporting, transaction checks, analytics review, and internal alerts, depending on your site and tools. The key is to look for evidence that the release works for real visitors, not just for an administrator who is already logged in.
Cloudways Pricing and Plan Context for Staging Users
How Cloudways positions its hosting and staging
Cloudways presents two primary product lines on its official homepage: Cloudways Flexible and Cloudways Autonomous. Cloudways Flexible is described as customizable managed hosting for WordPress, Magento, Laravel, WooCommerce, and PHP applications, with control over server and cloud choice.
Cloudways Autonomous is described as fully managed WordPress hosting for dynamic, high-traffic eCommerce and LMS sites, with autoscaling for thousands of concurrent users. For staging users, the practical takeaway is to assess the hosting model and application needs before making assumptions about the exact staging setup available to an account.
What official pages say about pricing structure
The official information provided identifies Cloudways Flexible and Cloudways Autonomous but does not verify standard hosting plan prices. For that reason, it is better not to rely on third-party claims about a cloudways staging cost or assume that staging availability has a separate price.
Cloudways’ official homepage also mentions Performance, Security, 24×7 Expert Support, Free Migration, and Free SSL. It lists DigitalOcean, Vultr, Linode, AWS, and GCE among its cloud provider options, while supported applications include WordPress, Laravel, Magento, WooCommerce, and PHP.
An official homepage promotion mentions Cloudways Advanced Support at $100/mo, with a new discounted $25/mo flat lifetime-deal context. That promotion should be checked directly on the official site because it should not be treated as a universal hosting-plan price or a general staging fee.
Why verified pricing matters for affiliates
Affiliate content should distinguish between practical guidance and claims that need current verification. Hosting plans, promotions, account eligibility, and product terms can change, so readers should confirm current details directly with Cloudways before deciding.
If you want to explore the platform while setting up a safer testing workflow, you can learn more through Cloudways on TopTrustReview. Evaluate the current official product details against your application, team process, and deployment needs.
Official website · Latest pricing & offers
FAQ
What is a staging environment in Cloudways?
A staging environment in Cloudways is a separate test copy of an application. It lets you test updates, code, themes, plugins, and configuration changes before making those changes on the live production site.
How do I create a staging site in Cloudways?
In the Cloudways platform, select the relevant server and application, open Staging Management, and choose Launch Staging Application. Then select the server for the staging application and verify the staging URL and access details.
Can I test WordPress plugin updates on Cloudways staging?
Yes. A cloudways staging WordPress setup is well suited to testing plugin, theme, and WordPress core updates before applying them to the live site. Check key pages, forms, mobile layouts, and any important business functionality after each update.
Should agencies use staging before client approvals?
Yes. Staging gives agencies a working review environment for design, content, and functionality changes. It supports clearer client feedback and gives your team a chance to complete QA before approving a production release.
Is Cloudways staging free?
Do not assume a separate price or free availability for staging without checking the current official Cloudways pages and your account’s product details. The supplied official pricing information does not verify a standard Cloudways staging fee or standard hosting plan pricing.
The safest website changes are usually the least dramatic: test in staging, document the result, deploy carefully, and verify production afterward. Used consistently, cloudways staging can help agencies, developers, and site owners make updates with far fewer live-site surprises.
Related Reading
- Cloudways Backup guide
- How to Speed Up WordPress with Cloudways
- Gohighlevel Pipelines: Ultimate Setup Guide
References
- Staging Environment that Simplifies Website Code Testing
- How to Create a Staging Environment
- WordPress Staging Site: How to Set Up & Create it Easily
- Staging Site: What It Is & Why You Need One?