Podsqueeze Tutorial: From Episode to Clips
This podsqueeze tutorial walks through a practical episode-to-clips workflow for podcasters, creators, agencies, and studios. Podsqueeze is an AI-powered platform that helps turn audio or video podcast episodes into transcripts, summaries, short clips with captions, audiograms, newsletters, blog content, social posts, and enhanced audio.
I reviewed the official product and pricing information before putting this guide together. The goal is not to promise instant viral content, but to show how one finished episode can become a useful library of publishable assets with a more efficient repurposing process.
Official website · Latest pricing & offers
What Podsqueeze Does and Who This Tutorial Is For
Podsqueeze in one sentence
Podsqueeze helps you transform a podcast episode or YouTube video into written, visual, and short-form content from one workspace. Its official feature set includes transcripts, SRT subtitle files, show notes, social posts, blog posts, newsletters, clips, audiograms, and AI audio enhancement.
For anyone researching how to use Podsqueeze, the core appeal is simple: upload or link to an episode, generate assets, select a useful moment, and refine it for publishing. Instead of treating every clip, caption, and post as a separate project, you can use the episode as the source for multiple content formats.
Best users: podcasters, creators, agencies, and studios
This workflow is especially useful for solo podcasters who need to publish consistently without spending hours manually repurposing each recording. A long interview, solo lesson, or panel discussion can contain multiple short moments worth sharing.
Creators publishing video podcasts can use Podsqueeze for captions and short-form podcast clips for TikTok, Instagram, and YouTube Shorts. The tool also supports YouTube video transcripts, which is useful if your main content starts as a public video rather than an audio file.
For agencies and studios, the value is in repeatability. Podcast folders and content-sharing pages can help organize episodes and make generated materials easier to share with clients or internal teams.
What you’ll accomplish by the end of this tutorial
By the end of this podsqueeze tutorial, you should understand how to:
- Start an episode project with a file upload or public YouTube link.
- Generate a transcript, subtitles, and supporting episode assets.
- Identify a strong chapter or section for a short clip.
- Create a clip or audiogram with captions.
- Refine subtitles and remove unwanted words in the text-based editor.
- Use the same episode for show notes, social content, newsletters, and blog drafts.
- Select a plan based on your monthly minutes and clip requirements.
The best results still begin with a clear source recording. Podsqueeze can help with the repurposing work, but it cannot turn an unfocused conversation into a focused message without some editorial judgment from you.
Podsqueeze Setup: Account, Dashboard, and First Project
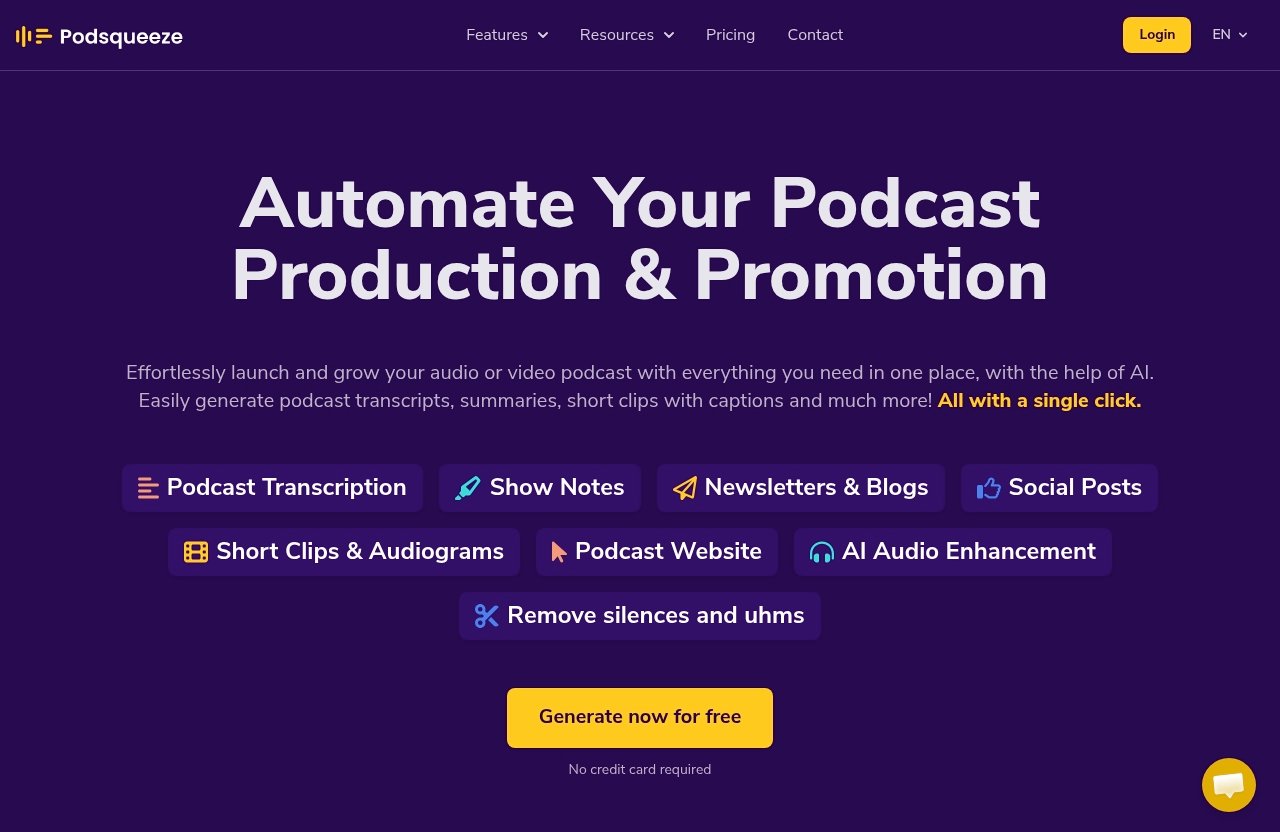
Create your account and log in
Start by visiting the official Podsqueeze site and creating an account through its available sign-up flow. Because account offers can change, review the current sign-up details directly on the site rather than assuming a trial length, payment requirement, or promotional offer.
Once inside, approach your first session with one goal: process a single episode all the way from source recording to clip. This is the fastest way to learn the platform without accumulating unfinished uploads.
If the official workflow fits your production process, you can try Podsqueeze through Top Trust Review and compare the available plan allowances before committing to a larger workflow.
Find the dashboard and key menus
A useful way to orient yourself in the dashboard is to look for the areas related to episode processing, transcripts, clips, content creation, and account usage. Official product information confirms capabilities for transcription, clips, audiograms, audio enhancement, written content, and podcast-related pages.
Do not try to generate every asset immediately. In my view, a beginner gets more value by first confirming that the transcript is usable and that the selected clip has a clear message. Once those two pieces are solid, the remaining repurposing tasks become much easier.
Set up a podcast folder or project
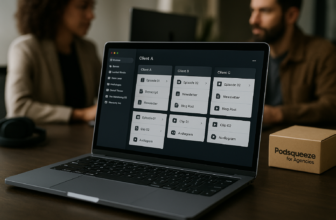
Podsqueeze supports podcast folders, which can be helpful when you publish a recurring show, manage multiple clients, or produce several series. Use a consistent naming system for folders and episodes so that your team can find the original recording, transcript, clips, and written assets later.
A simple structure might include the podcast name, episode number, guest name, and recording date. For example:
| Item | Example naming approach |
|---|---|
| Podcast folder | Creator Growth Podcast |
| Episode project | EP 24 - Building a Newsletter - Guest Name |
| Clip reference | EP 24 - 00:12 - Newsletter Hook |
| Export version | EP 24 - Clip 1 - Captions Reviewed |
This organizational habit matters more as you produce more content. It also reduces the risk of sharing a draft clip or an unreviewed caption file with a client.
Step 1: Upload Your Episode or Add a Public YouTube Link
Upload audio or video files
The first operational step in this podsqueeze tutorial is bringing in the source episode. Podsqueeze supports file uploads, and the official pricing page lists upload size limits by plan: Starter supports files up to 4GB, while Pro and Agency Lite support files up to 10GB.
Before uploading, listen to the beginning and a few random parts of the file. Check that the file is complete, that the voices are audible, and that there is no accidental dead air at the start or end. A clean source helps you evaluate transcription and clips more confidently.
The pricing page also lists unlimited uploads on Starter, Pro, and Agency Lite. However, your available monthly podcast minutes and included clip or audiogram count still affect how much content you can process and export under your plan.
Use a public URL when available
Podsqueeze also supports unlimited YouTube conversions on the listed Starter, Pro, and Agency Lite plans. If your episode is already published publicly on YouTube, using that source can be a convenient starting point for a podsqueeze tutorial YouTube workflow.
Only use a public URL that you own or have permission to repurpose. The practical benefit of using an existing video is that you can move from a published full episode toward transcript-based editing and short clips without preparing a separate upload first.
Whether you upload a file or use a public link, start with the best available version of the episode. A low-resolution or poorly recorded source can limit how polished the final short-form asset feels.
What file and episode details to prepare
Prepare the essentials before processing:
- The final audio or video episode.
- The correct episode title.
- Guest name spelling and brand names.
- Links, resources, or offers mentioned in the episode.
- A rough idea of the target audience for clips.
- A list of notable timestamps, if you already have them.
The official site states that Podsqueeze can generate show notes with timestamps, bullet points, and mentions. Having your own reference notes is still useful because you can quickly verify names, technical terms, URLs, and industry jargon in the resulting assets.
For a podcast to clips tool, source quality and context are the two most important inputs. The AI can help surface and format material, but you remain responsible for ensuring the final output accurately represents the guest and conversation.
Step 2: Generate the Transcript and Episode Assets
Run transcription
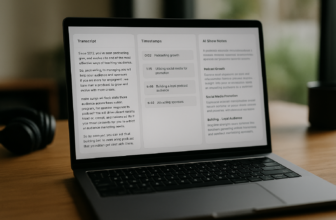
After importing the episode, generate the transcript and episode assets available for your project. Podsqueeze officially offers podcast transcripts and YouTube video transcripts, making the transcript the central working document for both audio-first and video-first creators.
A transcript does more than provide a written record. It gives you a searchable way to spot answers, stories, disagreements, actionable advice, and memorable quotes that could become clips or written posts.
In this podsqueeze tutorial, I recommend treating the transcript as your editorial map. Scan for sections where someone makes a complete point without requiring too much setup. Those sections are usually stronger candidates for a short clip than isolated jokes or vague statements.
Review speaker labeling and accuracy
Review the transcript before using it for subtitles, show notes, or promotional copy. Pay close attention to proper names, product names, acronyms, numbers, and any phrases that could change meaning if transcribed incorrectly.
If the transcript view presents individual speaker sections, verify who said what before publishing a quote or a clip. Even when the words are broadly accurate, a misattributed statement can create avoidable confusion for guests and audiences.
A practical review pass can be quick:
- Read the opening minute for overall accuracy.
- Search for the guest’s name, company, and key terms.
- Check the exact segment you want to clip.
- Listen to the clip while reading the captions.
- Correct obvious errors before export.
This small quality-control step is important for any podcast transcript generator. The transcript feeds into other assets, so an early correction can improve subtitles, summaries, and social copy at the same time.
Export transcript, SRT, and supporting assets
Podsqueeze can generate full transcripts and SRT subtitle files. An SRT file is useful when you need a standard subtitle format for a separate publishing or editing workflow.
The official feature set also includes show notes with timestamps, bullet points, and mentions. These are useful starting materials for episode pages, listening guides, email copy, and internal review documents.
Think of the output as an asset bundle rather than a single transcript. Your long-form episode can now support captions, episode notes, a potential blog draft, a newsletter, and social content—all while keeping the original conversation as the source of truth.
Step 3: Turn an Episode into Clips and Audiograms
Choose a chapter or segment
This is the most important stage of the podsqueeze tutorial because clips are only effective when the selected moment stands on its own. Podsqueeze allows users to choose a chapter from an episode and export it as a clip or audiogram for TikTok, Instagram, and YouTube Shorts.
Start by looking for a chapter or segment with one clear takeaway. The best moments often include a strong opinion, a concise framework, a surprising result, a useful lesson, or an answer to a common question.
A reliable short-clip structure looks like this:
| Clip element | What to look for |
|---|---|
| Opening hook | A statement that creates immediate curiosity |
| Core idea | One lesson, perspective, or insight |
| Context | Only the background needed to understand it |
| Ending | A complete conclusion, not a cut-off sentence |
For example, a guest explaining “the biggest mistake new consultants make” may produce a more compelling clip than a two-minute introduction to their career. The first has an obvious promise; the second may need too much context.
Avoid selecting a segment solely because it sounds dramatic. A good clip should be accurate, understandable without the full episode, and aligned with the type of audience you want to attract.
Select a clip template
Podsqueeze includes saved video templates on the listed Starter, Pro, and Agency Lite plans. Templates can support consistency when you create repeated short-form content from a podcast series.
For an audiogram creator workflow, use a visual style that supports the message instead of distracting from it. Keep text readable, leave enough space for captions, and make sure any branding does not cover a speaker’s face or important on-screen information.
If you manage several shows, create a distinct template approach for each one. A business interview podcast may need restrained visual treatment, while an entertainment show may benefit from a more energetic format. The key is consistency, not complexity.
Use the text-based editor to refine subtitles and trims
Podsqueeze offers a text-based editor that can fine-tune subtitles and trim videos by removing specific words. This is particularly useful when the spoken message is strong but contains a false start, repeated phrase, or unnecessary setup.
Read the transcript of your selected clip from start to finish. Look for words that do not add meaning, then trim carefully so the segment still sounds natural. Do not over-edit every pause or hesitation; overly aggressive cuts can make speech feel rushed and reduce clarity.
Subtitle review deserves the same attention as the clip itself. Captions should accurately reflect what is being said, especially when the speaker uses names, statistics, or specialized terminology. Many viewers will first encounter your content with sound muted, so readable subtitles can determine whether they keep watching.
Let AI create one-click shorts
The official site states that AI can shorten each chapter to under 60 seconds for one-click shorts. This can be a useful starting point when you want to create several short-form podcast clips from a longer conversation efficiently.
Use AI-generated shortening as a first draft, not an automatic approval. Watch the complete result and ask three questions:
- Does the opening make sense immediately?
- Has the edit preserved the speaker’s intended meaning?
- Would someone who never heard the full episode understand the point?
This is where human judgment adds real value. AI podcast clips can save time on initial selection and shortening, but an editor should still confirm pacing, context, captions, and the final message.
For TikTok, Instagram, and YouTube Shorts, keep the viewer experience in mind. A clip that starts with “As I mentioned earlier” is usually weak because the audience did not hear the earlier discussion. Trim toward the clearest self-contained statement whenever possible.
Official website · Latest pricing & offers
Step 4: Enhance Audio and Clean Up Filler Words
Remove ums and silences
Podsqueeze can remove ums and silences through its audio editing and enhancement capabilities. For spoken-word episodes, this may help create tighter clips that get to the main point faster.
Use this feature selectively. Removing obvious filler words can improve flow, particularly in a short educational tip or a promotional clip. But preserving some natural speech rhythm can make a conversation feel more authentic, especially in interviews.
In this podsqueeze tutorial, the practical rule is to remove distractions rather than personality. Focus on repeated fillers, long empty pauses, and moments that interrupt comprehension.
Improve sound quality with AI
Podsqueeze offers AI audio enhancement, which can be useful when you want a more polished listening experience before extracting clips. The official pricing details list Audio Enhancement and the Podcast Audio Editor across Starter, Pro, and Agency Lite.
Enhancement is especially worth considering when the core insight is valuable but the source has uneven sound quality. It can also be useful before turning an audio-only moment into an audiogram, where the voice must carry much of the audience experience.
Still, listen to the enhanced result before publishing. Compare a few sections with the original and make sure the output sounds clear and natural to you.
When enhancement matters for clips
Audio cleanup matters most when a clip is short and direct. In a 30- or 60-second segment, background distractions, long pauses, and frequent filler words are more noticeable because the audience has little time to settle into the conversation.
Enhance before your final clip review so you evaluate the version your audience will actually hear. Then check that captions still match the revised spoken content and that the clip begins and ends cleanly.
This sequence makes podcast repurposing more dependable: improve the listenability first, then polish the visual and textual presentation around it.
Step 5: Repurpose the Same Episode into More Content
Generate show notes
Podsqueeze can generate show notes with timestamps, bullet points, and mentions. These assets can help listeners navigate a longer episode and give you a useful base for an episode page or publishing description.
Review generated show notes for accuracy before posting them. Confirm guest names, links, timestamps, and claims that may need context. A concise, trustworthy episode summary is more useful than an overly broad list of topics.
The official platform also offers a podcast website with embedded players, automatically generated episode pages, and SEO-optimized show notes. For creators building a more complete podcast presence, this can connect the episode itself with its supporting content.
Create blog posts and newsletters
Podsqueeze can generate blog posts and newsletters from episodes. This is valuable when an interview contains a process, framework, or lesson that can be explained in written form for people who prefer reading to listening.
A sensible approach is to choose one central episode theme rather than asking a blog post to summarize every minute of a long discussion. For a newsletter, focus on one useful insight, add a short introduction, and point readers toward the full episode or relevant clip.
This part of the podsqueeze tutorial is where a single recording becomes a content source rather than a one-time publication. The same conversation can support audio listeners, video viewers, email subscribers, and search-focused readers.
Produce social posts from the episode
The official feature list includes social media posts and bite-sized insights. These can support your clips by giving you post copy, quote ideas, and smaller observations to publish between full episode releases.
Avoid posting every generated idea without editing. Choose the platform, audience, and goal first. A LinkedIn post may need more context and a professional takeaway, while an Instagram caption may work better with a concise hook and a direct connection to the video clip.
A practical weekly publishing set from one episode could include:
- One full episode announcement.
- Two or three clips from different chapters.
- A short text post built around a key insight.
- A newsletter takeaway.
- A blog post based on the strongest theme.
- Show notes that help existing listeners navigate the episode.
Podsqueeze Pricing: Which Plan Fits a Beginner, Creator, or Agency?
Podsqueeze pricing is displayed with monthly billing, and the official page also labels an annual option as “Annually 30% OFF.” The official page copy provided does not list annual plan prices, so compare current billing details directly before choosing.
Starter plan overview
Starter is listed at $8.99 per month. It includes 120 minutes of podcast time per month, minutes rollover, and 8 video clips or audiograms.
It also includes file uploads up to 4GB, unlimited uploads, unlimited YouTube conversions, Podcast Website, Audio Enhancement, Podcast Audio Editor, Chat with transcript, personalized results, and saved video templates.
For a beginner working on one show with a modest publishing schedule, Starter is the clearest entry point. The 120-minute allowance and 8 clip or audiogram allowance make it important to plan which episodes and moments you want to prioritize.
Pro plan overview
Pro is listed at $49 per month. It includes 320 minutes per month, minutes rollover, and 20 video clips or audiograms.
The plan includes files up to 10GB, unlimited uploads, unlimited YouTube conversions, podcast landing pages, audio enhancement, podcast audio editor, chat with transcript, personalized results, and saved video templates.
Pro is better suited to active creators with longer episodes, more frequent releases, or a greater need for repeatable clip production. It can also make sense for a podcast manager handling a small number of recurring shows.
Agency Lite overview
Agency Lite is listed at $89 per month. It includes 600 minutes per month, minutes rollover, and 40 video clips or audiograms.
Like Pro, it supports files up to 10GB and includes unlimited uploads, unlimited YouTube conversions, podcast landing pages, audio enhancement, podcast audio editor, chat with transcript, personalized results, and saved video templates.
For agencies, studios, or teams producing multiple client episodes, Agency Lite provides a higher monthly capacity. Podcast folders and content-sharing pages can also be relevant for organizing work and sharing outputs with clients and teams.
Enterprise custom option
Enterprise Custom uses custom pricing. According to the official pricing information, it includes everything in Pro plus custom minutes, custom clips, priority support, feature requests, team onboarding, and training.
This is the option to consider when standard minute and clip allowances do not match your production volume or when your team needs more structured support. Contact the provider directly for current Enterprise details rather than estimating costs from the standard plans.
| Plan | Monthly price | Podcast minutes | Clips or audiograms | File upload limit |
|---|---|---|---|---|
| Starter | $8.99/mo | 120 | 8 | Up to 4GB |
| Pro | $49/mo | 320 | 20 | Up to 10GB |
| Agency Lite | $89/mo | 600 | 40 | Up to 10GB |
| Enterprise Custom | Custom | Custom | Custom | Not specified in provided pricing facts |
Common Mistakes to Avoid in a Podsqueeze Workflow
Uploading low-quality audio
Even with AI audio enhancement available, start with the cleanest audio or video source you have. Extremely unclear speech, overlapping voices, or heavy background noise can make transcript review and subtitle editing more time-consuming.
Before uploading, verify that the episode is final. Processing an outdated recording wastes monthly podcast minutes and can create confusion when multiple versions of the same clip are circulating.
Choosing clips without a strong hook
A common mistake in a podsqueeze tutorial workflow is selecting a clip because it is meaningful within the full episode but unclear on its own. Short-form viewers need an understandable opening within the first few seconds.
Choose moments that state the problem, insight, or tension quickly. If a section needs a long explanation to make sense, it may work better as a written post or a longer excerpt rather than a short clip.
Skipping subtitle review
Automatically generated captions are a starting point, not a final publishing step. Review subtitles for names, numbers, technical terms, and punctuation that changes meaning.
Use the text-based editor to refine subtitle wording and remove unwanted words from the video where appropriate. This final pass improves accessibility and makes your brand appear more careful and credible.
Ignoring audience-specific formats
The same clip does not always need the same framing, caption, or opening line across every platform. Podsqueeze supports exports for TikTok, Instagram, and YouTube Shorts, but you should still consider what your audience expects on each channel.
A concise business insight may perform best with a clear headline and clean captions. A creator-focused lesson may benefit from a more personal hook. Keep the central message consistent while adapting the presentation to the audience.
Final Verdict: Is Podsqueeze Worth It for Episode-to-Clips Repurposing?
Who will get the most value
Podsqueeze is worth considering if your podcast process regularly produces long episodes but your team struggles to turn them into transcripts, captions, clips, audiograms, and written content. It is particularly practical for creators who want one source episode to support several publishing channels.
The platform’s combination of transcription, SRT exports, chapter-based clips, one-click under-60-second shorts, text-based editing, audio enhancement, show notes, blogs, newsletters, and social posts gives it a focused podcast repurposing use case.
When to start with the Starter plan
Start with Starter if you are a beginner, solo host, or small creator with a manageable monthly episode schedule. At $8.99 per month, it provides 120 monthly podcast minutes, minutes rollover, 8 clips or audiograms, and the core tools needed to test a full episode-to-assets workflow.
Move to Pro when your episode volume, total minutes, or clip needs exceed Starter’s included capacity. Choose Agency Lite when you manage multiple shows or clients and need 600 monthly minutes and 40 clips or audiograms.
Best next step for readers
The best way to evaluate this podsqueeze tutorial is to process one completed episode from start to finish. Generate the transcript, identify two strong chapters, review the captions, make one clip and one audiogram, then compare the time spent with your usual manual workflow.
For most first-time users, Starter is the sensible place to begin. Pro fits more active creators and podcast managers, while Agency Lite is the better match for agencies and studios producing content across several clients or shows.
Official website · Latest pricing & offers
Related Reading
- How to Use Podsqueeze Show Notes in 2026
- Contentstudio Tutorial 2026: Setup to First Post
- Syllaby Affiliate Program Review 2026: Is It Worth Joining?
References
Frequently Asked Questions
How do I make a clip from a podcast episode in Podsqueeze?
Upload a file or add a public YouTube link, then generate the episode assets in Podsqueeze. After that, choose a strong chapter or section, create a clip or audiogram with captions, and refine it in the editor before exporting.
Can Podsqueeze create short clips automatically?
Yes. The article notes that Podsqueeze can shorten each chapter to under 60 seconds with one click for short-form platforms. That makes it useful for creating quick social clips from a longer episode.
Does Podsqueeze make transcripts and subtitles too?
Yes. The official feature set described in the article includes transcripts and SRT subtitle files, along with show notes, social posts, blog posts, newsletters, clips, audiograms, and AI audio enhancement.
Is Podsqueeze only for podcasts, or can it handle YouTube videos too?
The article says Podsqueeze works with podcast episodes and YouTube video transcripts. That means it can support both audio-first podcast workflows and public video sources where that feature is available.
Which Podsqueeze plan is best for a beginner?
The article points readers toward the Starter plan as the likely starting point for beginners. It also advises checking the official pricing page for the latest limits and included features before choosing a plan.